Certificate activation and issuance
Any of your domain certificates may be installed to enable a secure connection to server services like cPanel login, Webmail service, and WHM. Once a certificate is issued, you may install it via your WHM to establish a secure connection to any of the above mentioned services via secure ports 2083//2096/2087, respectively.
As a reminder, an SSL certificate should be activated in your account first using the CSR code generated on the server along with the Private Key. The CSR code is used for certificate activation and the Private Key should be saved on your server for further certificate installation.
You may view the CSR generation instructions on our site.
Installation process for server services in WHM
Once you receive your SSL certificate, please proceed with the following steps to have it installed for server services via your WHM Manage Service SSL Certificates menu.
NOTE: Manage Service SSL Certificates menu is not accessible if you have a shared hosting plan with your hosting provider. The option to install the certificate for securing server services is available only if you have a root access to your server.
For the certificate installation:
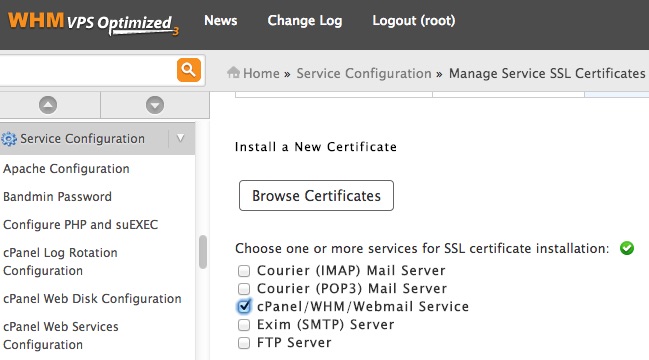
- Log into your WHM
- Select Service Configuration >> Manage Service SSL Certificates
- Find Install New Certificate
- Tick the services for which you want to enable SSL (cPanel/WHM/Webmail Service, etc).
Below you will see three fields that must be filled out with the corresponding codes:

- The Certificate field should be filled out with the issued certificate received from the Certificate Authority.
- The Private Key field requires the Private Key code that was generated along with the CSR code in your WHM or cPanel.
- The third Certificate Authority bundle field usually contains several certificates, combined in the necessary order, which should be installed as well to prove that your certificate is verified to a trusted root. You may download a .zip file containing your domain certificate along with a Certificate Authority bundle (.ca-bundle file) in your SSLs.com account. More detailed instructions on how to download it in your account can be checked here.
CA bundle can be also downloaded separately for the necessary certificate via this link.
IMPORTANT: Though this box is marked as optional, we recommend that you fill it out, as many older browsers and mobile devices may otherwise consider your SSL certificate “untrusted”.
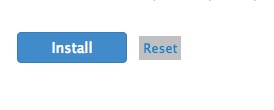
Once all three fields are completed, click Install.
After installation, you will be asked to restart cpsrvd (cPanel service daemon) in order to apply the changes.
Click Proceed to complete the installation.
Once this is complete, you will be able to log in to your cPanel, Webmail service, and WHM using secure ports (example:2083, example:2087, example:2096, eg.).
An SSL certificate can be installed for any service on this page, however the services will work for the server name only.
We recommend that you clear your browser cache before trying to access your services using https:// connection.
Securing server services in Plesk
If you would like to use the certificate to secure services in Plesk, it is necessary to replace the Default certificate generated during Plesk installation.
Once the certificate for a domain name is installed, it should be assigned to the necessary services.
This new SSL certificate can be found in the list* and to use it, you need to click on Secure control panel if you have Plesk 8.2 or later, otherwise click Install if you have an older Plesk version. Instructions for different versions are listed below:
*For Parallels Plesk Panel version 10.x:
Tools & Utilities >> SSL Certificates
For Parallels Plesk Panel version 9.x:
Settings >> SSL Certificates
For Parallels Plesk Panel version 7.x, 8.x:
Server >> Certificates
Redirect setup
To access your cPanel/WHM or Webmail securely, it is necessary to set up an automatic redirect to the proper SSL/TLS ports so that visitors are able to access the following URLs:
www.example.com/cpanel
www.example.com/webmail
www.example.com/whm
We recommend setting up the following redirect rules in your WHM:
Always redirect to SSL and SSL redirection destination – Hostname.
These rules can be found in Home >> Server Configuration >> Tweak Settings >> Redirection in your WHM.
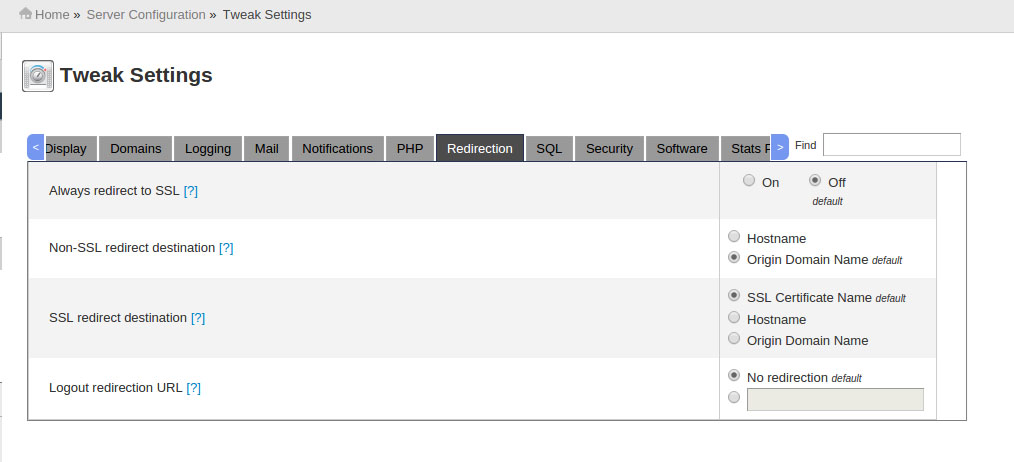
Always redirect to SSL is set to “Off” by default.
To enable this rule, select the “On” radio button.
The SSL redirect destination – Hostname option redirects visitors to the server’s hostname. For example, if the server’s hostname is host.domain.com, visitors typing http://domain.com/cpanel in the browser will be redirected to https://host.domain.com:2083 which uses a secure connection.
SSL Certificate Name is the default option here, simply click on Hostname to enable the redirect.
As soon as the redirect rules mentioned above are applied, visitors will automatically be able to access the server services using a secure connection.
Should you face any complications during the installation process, feel free to contact our SSL Support Team.