In order to generate a CSR (Certificate Signing Request) on your Mac OS server, you need to log into the server first.
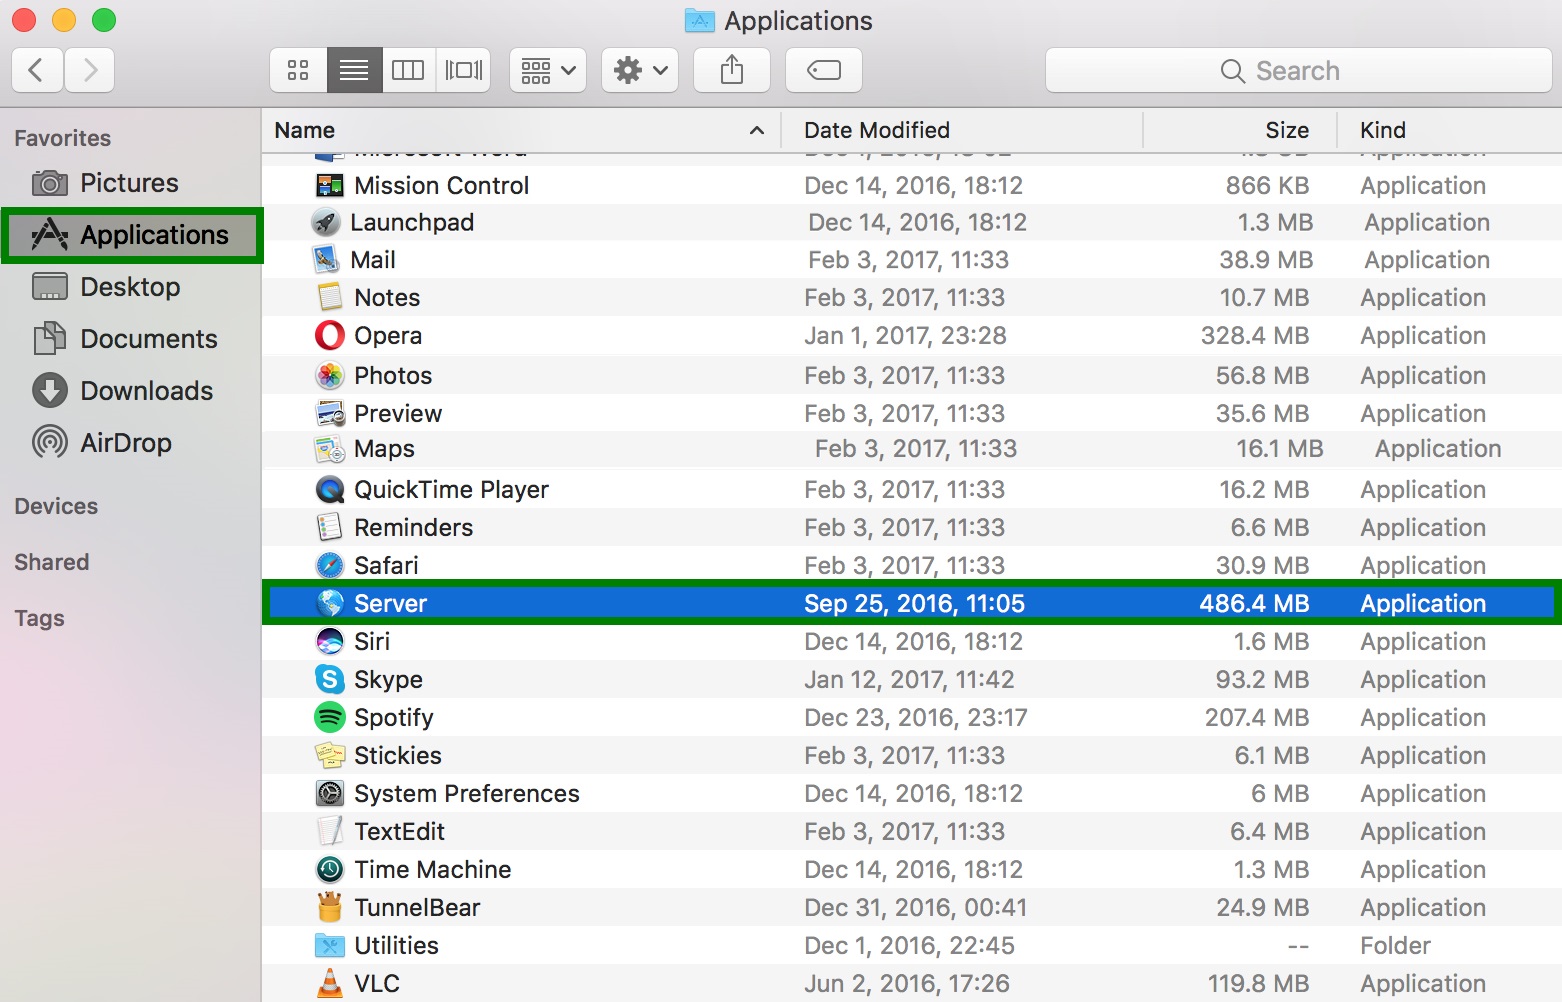
1. To log in to the server, open Finder, find the Applications section and choose Server:
2. Select the server on which you are going to install the certificate:
a) This Mac – YourServerName to generate the CSR code on the same server.
- Select the This Mac – YourServerName option
- Enter your Administrator Name as well as Administrator Password and hit Allow to proceed.
b) Other Mac to generate the CSR code on any other server.
- Select the Other Mac – YourServerName option and hit Continue.
- Enter Hostname/IP address, Administrator Name, Administrator Password and click Allow to move further.

3. Select Certificates under the Server section:
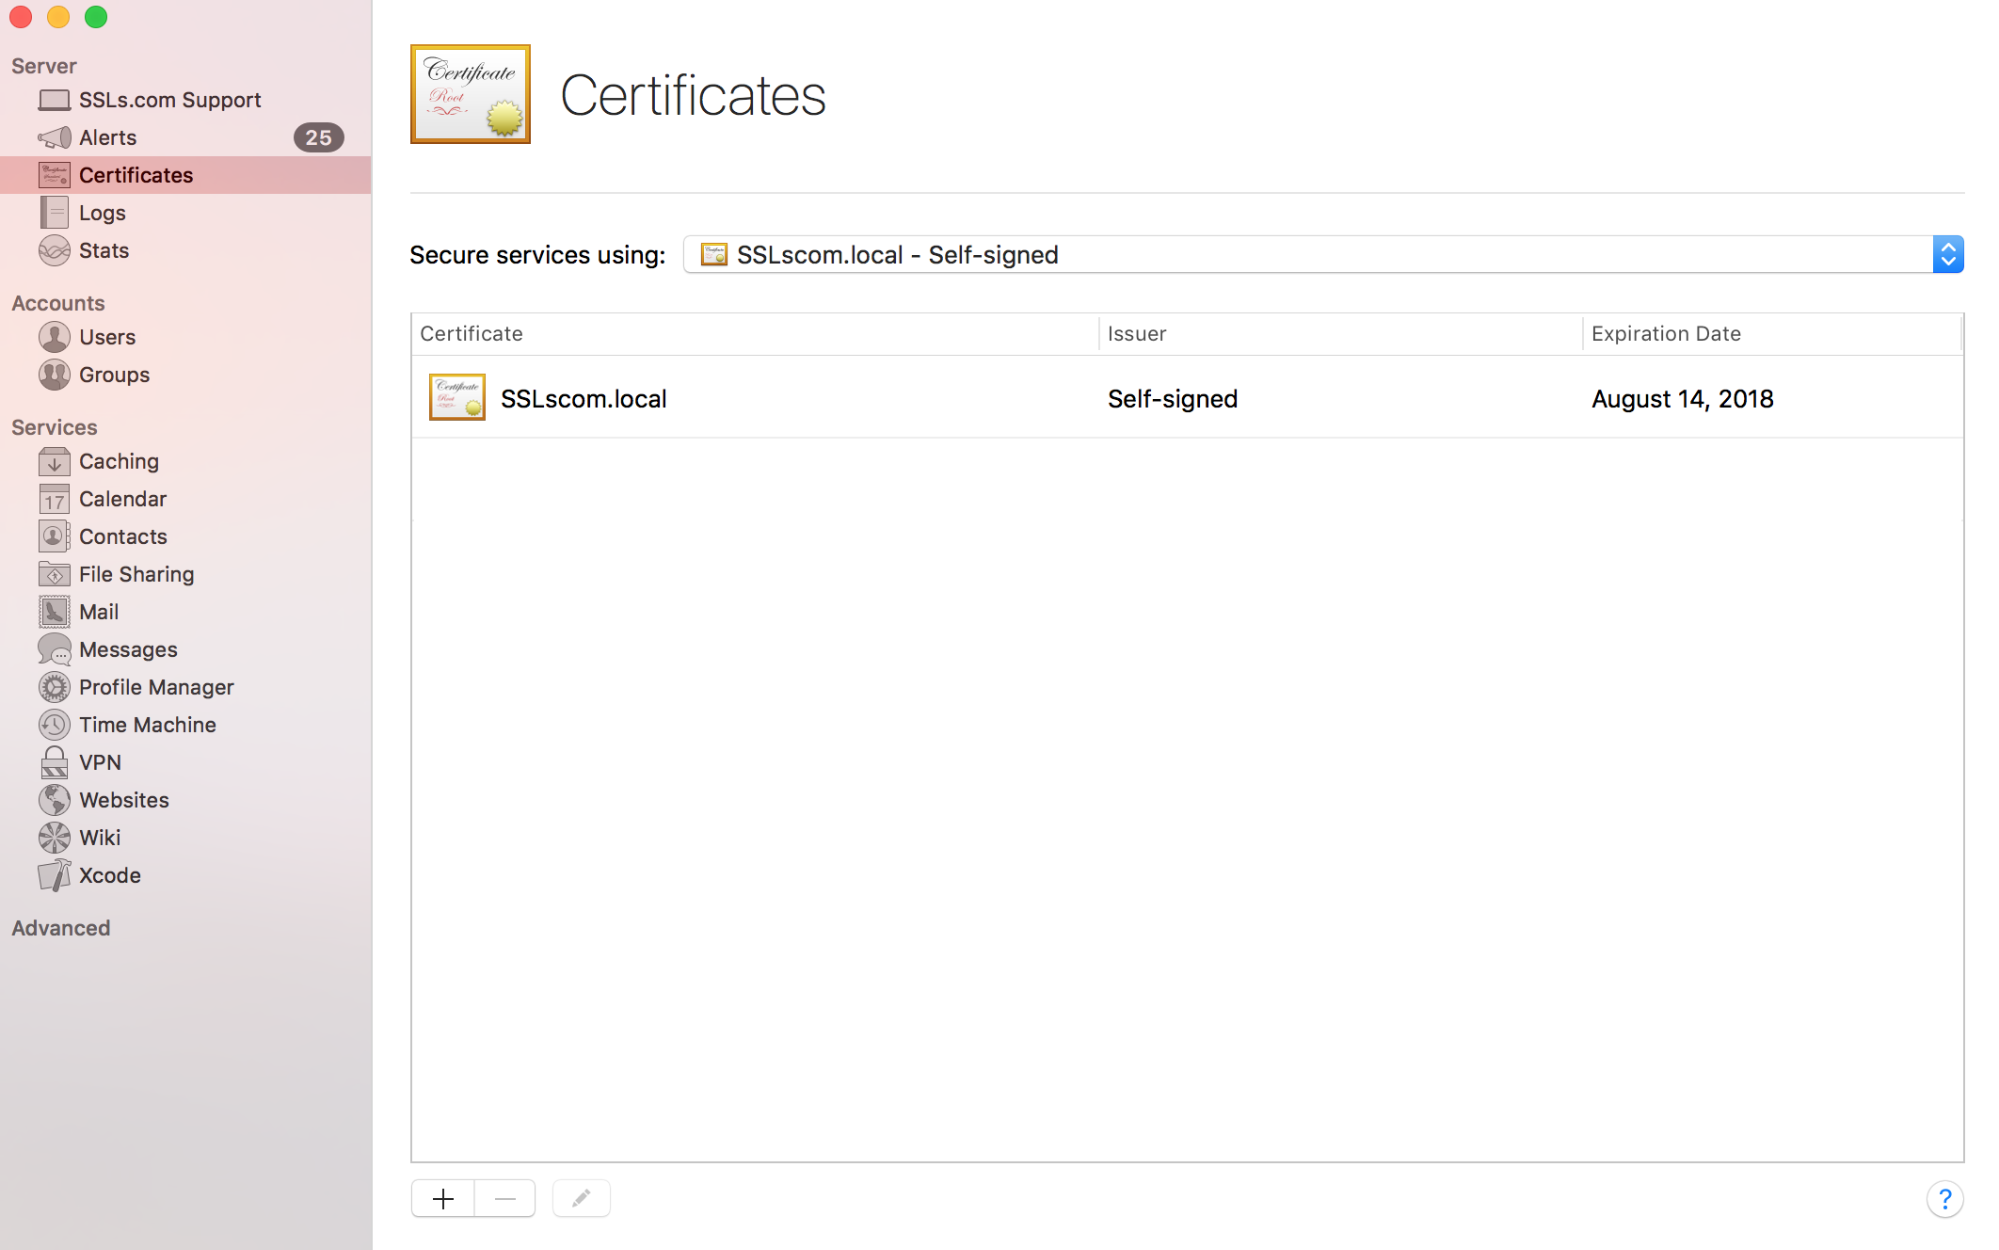
There you can see a “local” self-signed certificate with the name of your server.
This certificate is signed by the server itself, rather than a trusted certificate authority.
This type of certificates is not trusted by other applications/operating systems and browsers, which may lead to authentication errors. Thus, it is not recommended to use it.
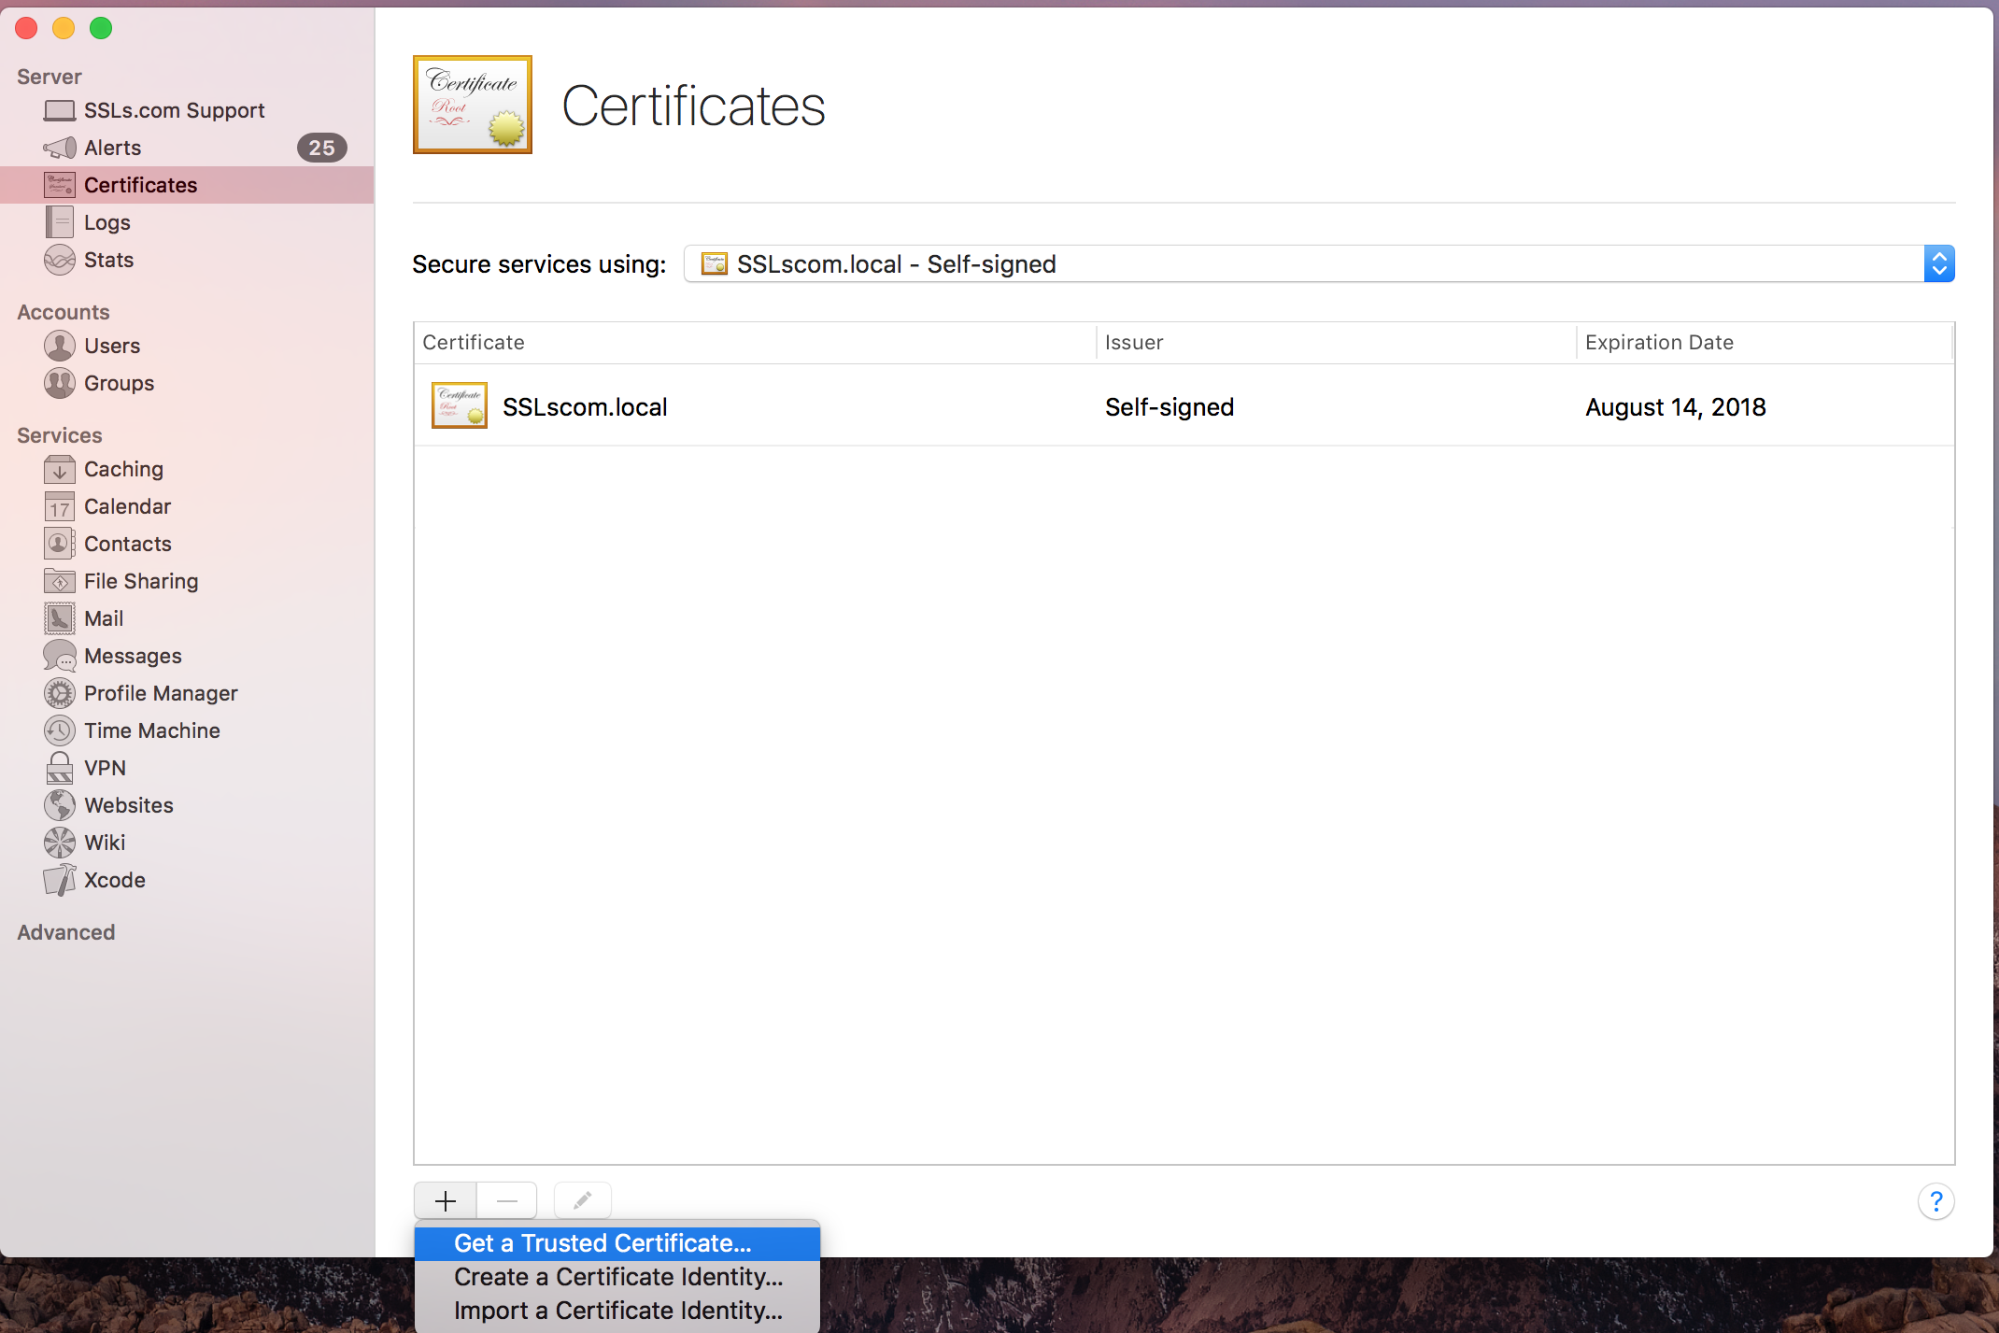
4. Click the “+” button on the same page and choose the Get a trusted certificate option to generate the CSR code for the certificate activation:
5. Click Next on the Get a trusted certificate page:

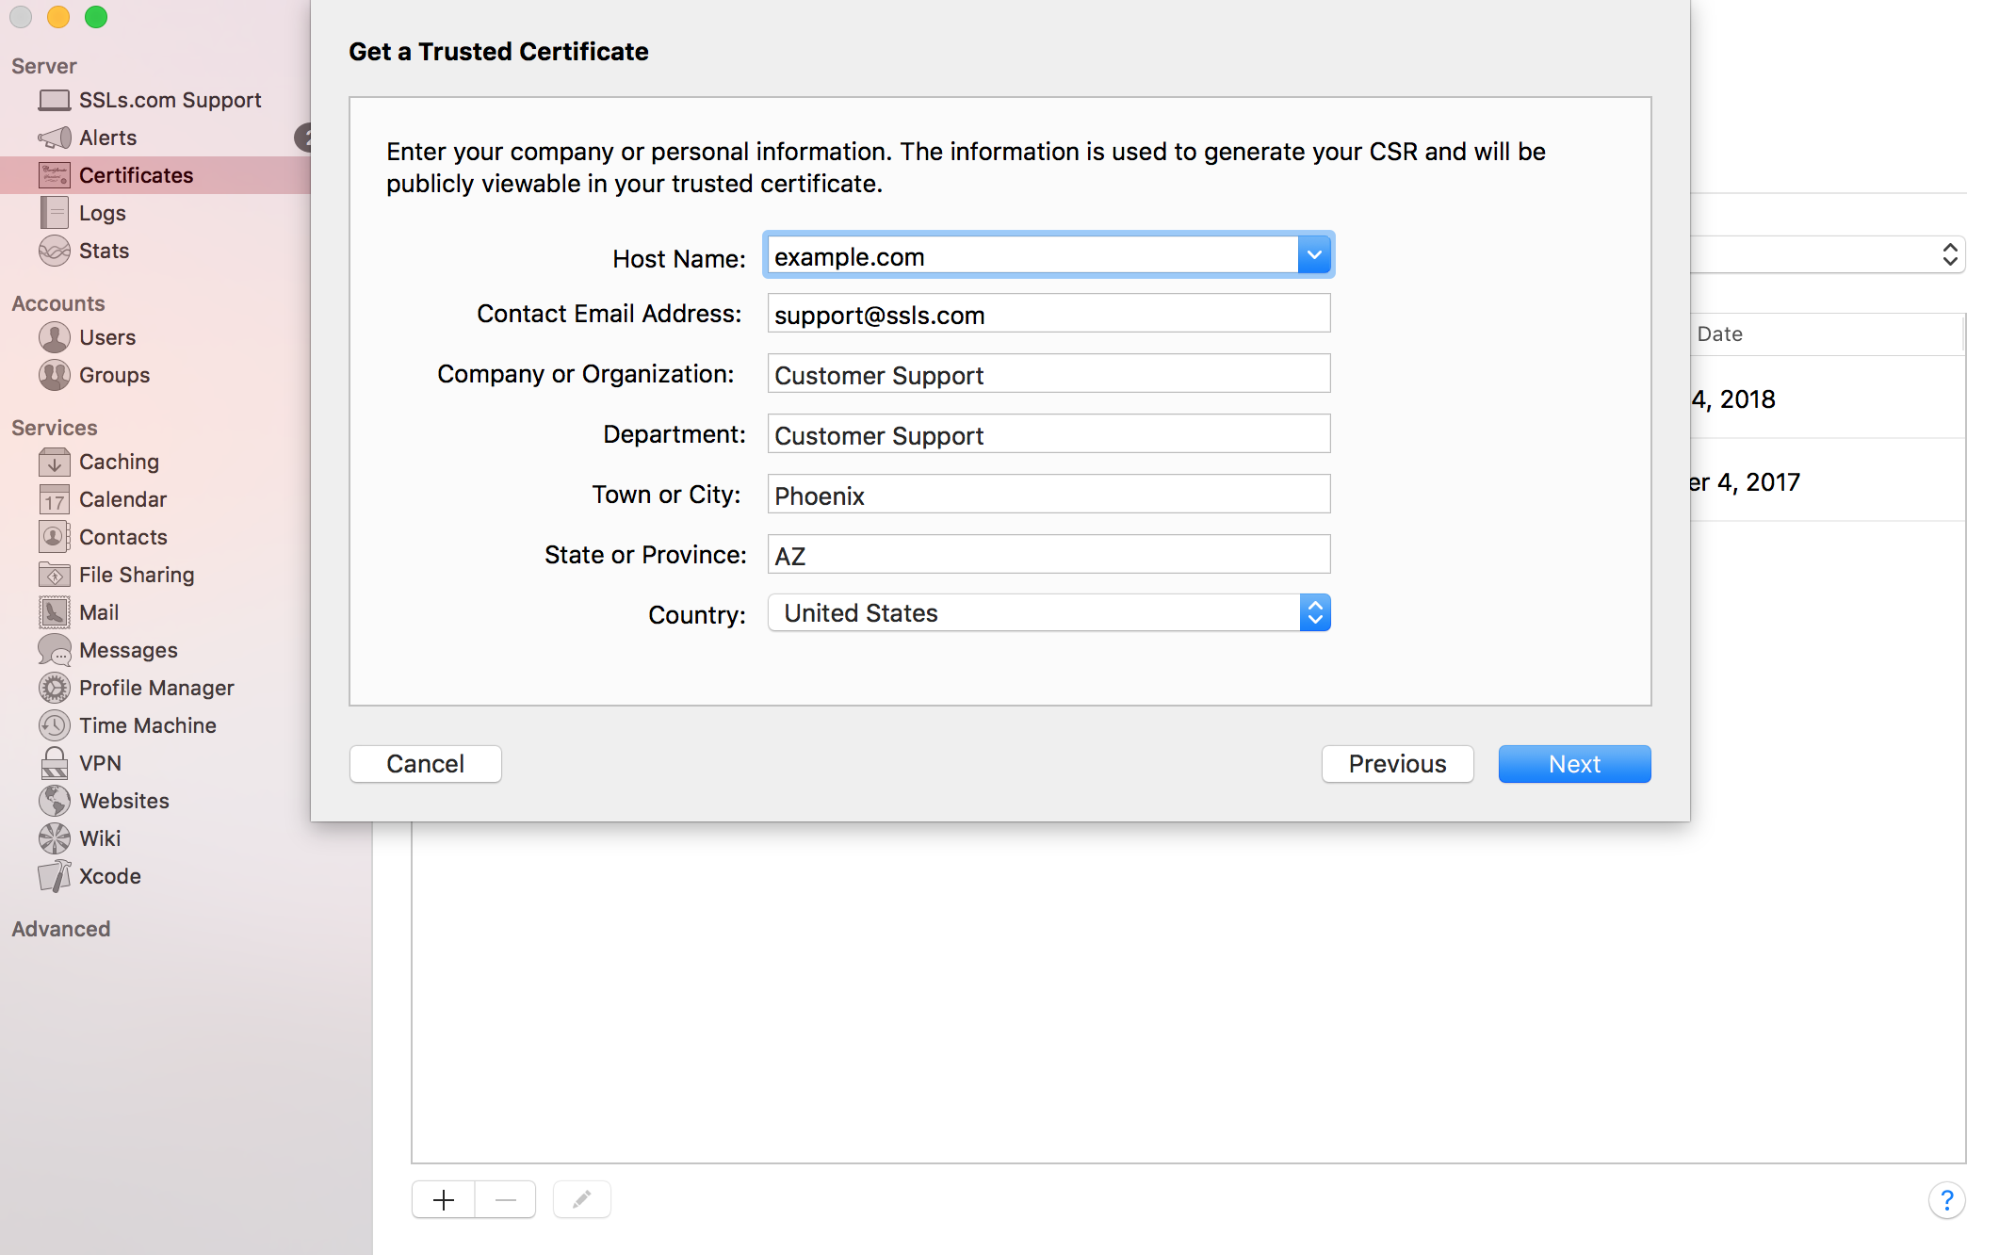
6. Fill in the fields with the required information. Please keep in mind that the use of non-alphanumeric characters (( ) ` ~ ! @ # $ % ^ & * – + = | { } [ ] : ; ” ‘ < >?) may lead to an error during the activation process in your account, thus, try to avoid using them.
- Host Name: domain name (subdomain) you would like to secure (example.com in case with single-domain and multi-domain certificates; *.example.com for wildcard certs).
- Contact Email Address: email address one can use to contact the website’s administrator.
- Company or Organization: registered name of your company or organization (if you do not have one, you can use NA instead).
- Department: name of your department within the organization ( for example, IT or NA if you do not have one).
- Town or city: town or city where your company is located.
- State or province: state or province where your company is located.
- Country: choose your country from the drop-down menu.
7. Click Next to generate the CSR code.
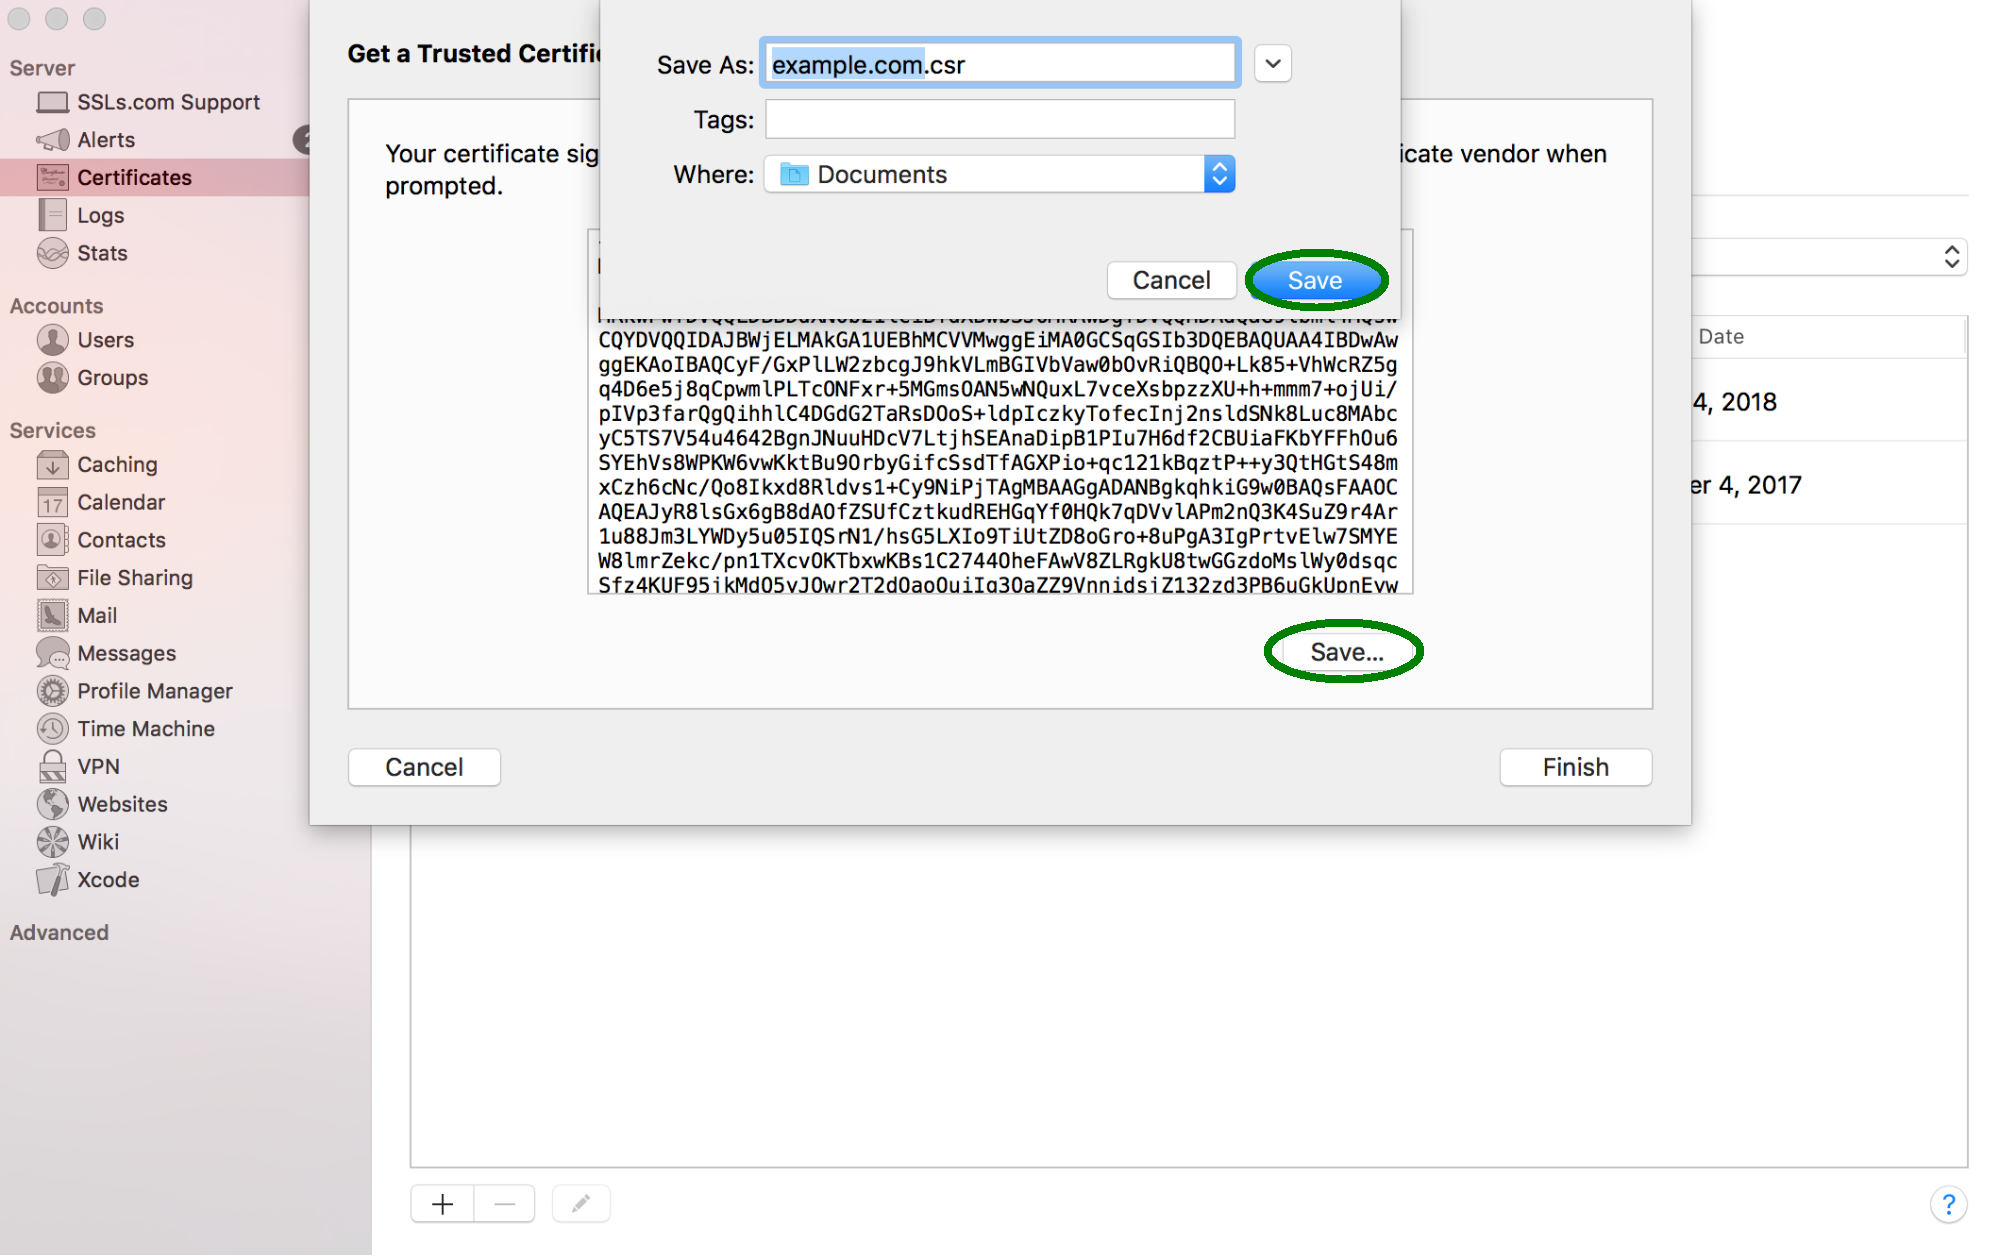
8. Click Save to save the generated CSR code. You will be able to open this file any time with the help of TextEdit:
The RSA Private Key will be generated automatically along with the CSR. It will be stored in the Keychain of your Mac.
Once the CSR code is generated, you can proceed with the activation process of your SSL certificate in your SSLs.com account. The guide on the certificate activation process can be found here.