Once the certificate is activated, validated and issued, it needs to be installed on your appliance.
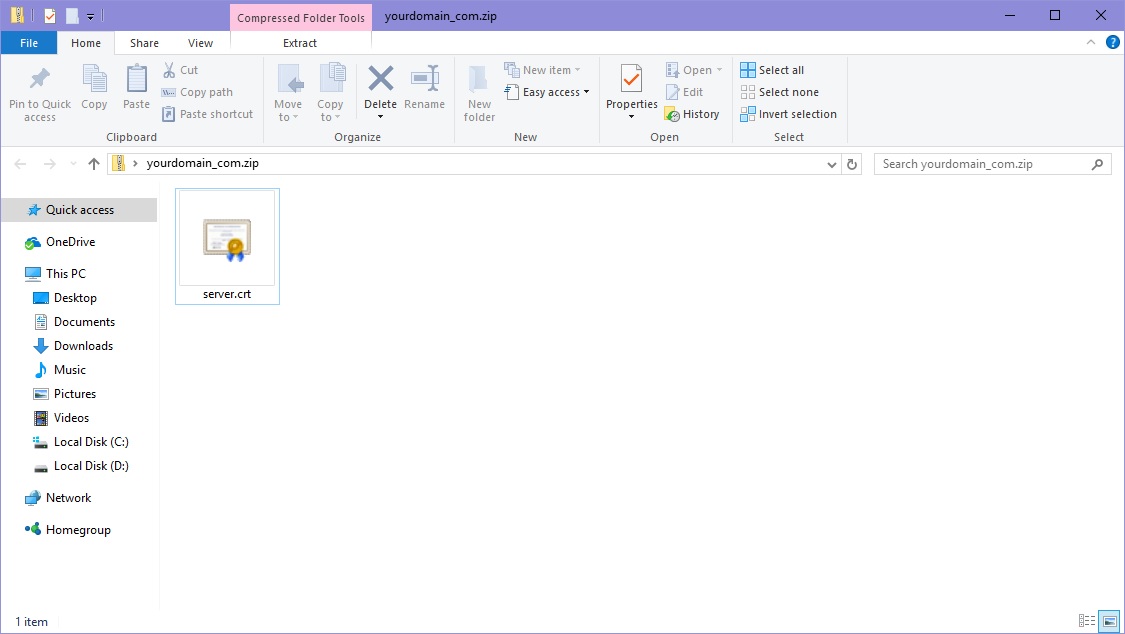
First, you need to download your issued SSL certificate. Once the SSL is downloaded, please extract it and rename to server.crt.
Note: Due to the peculiarity of the server, it is necessary to use default file names; the router will identify the file without any issues:
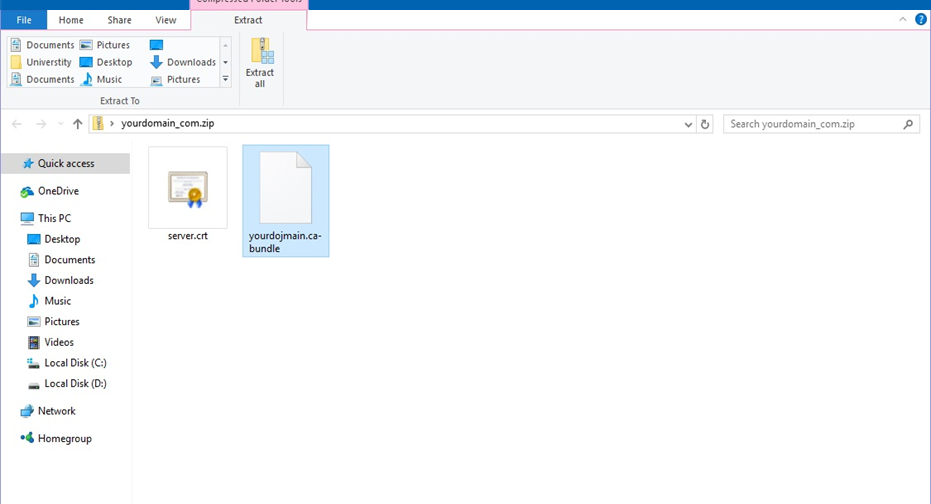
- Create a .zip file with two files. Please take the .crt downloaded from the SSLs.com Account Panel and also, use server.key generated during CSR creation on your SSL-VPN appliance.
The easiest way to create a zip file is to copy both files into a specific folder, select these files, right-click on them, and then click Send to > Compressed Folder.
2. Log into the SonicWALL SSL-VPN appliance portal.
3. After that, please expand the System menu and click Certificates.
4. Then it is needed to install CA certificates in order to make your website compatible in browsers.
5. On the System > Certificates page, in the Additional CA Certificates section, click Import CA Certificate:
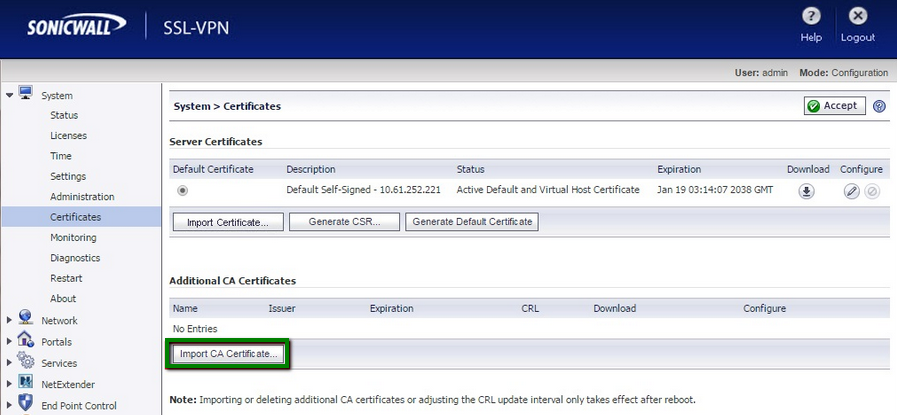
Please upload the file downloaded from the SSLs.com Account Panel with the .ca-bundle extension:
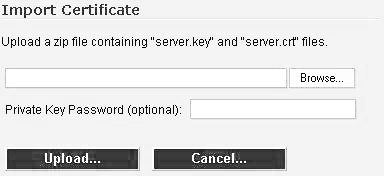
6. In the Server Certificates section, click Import Certificate:
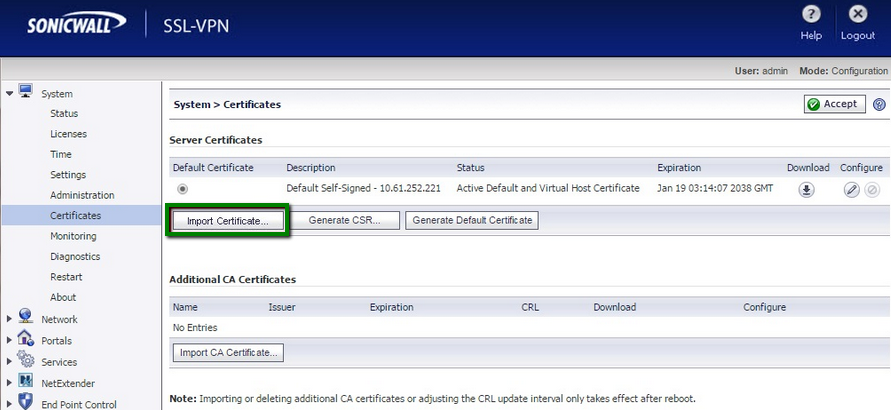
7. In the opened Import Certificate window, click Browse, locate and open the .zip file that you created.
8. Click Upload:
Once it is imported, the certificate will appear in the Server Certificates list on the System > Certificates page.
9. And now you need to configure your SSL Certificate.
a) On the System > Certificates page, in the Server Certificates section just right next to your SSL Certificate with the pending request, click the Configure icon.
b) At the next step, please specify the password created during the CSR code generation.
c) Click the Submit button.
10. Now it is needed to implement the changes.
a) In the System > Certificates section, please select the corresponding certificate.
b) In the top right corner of this page, click Apply.
c) If you are not prompted to restart your SonicWALL SSL-VPN appliance, please restart it manually.
11. In order to restart the SonicWALL appliance, please expand the System menu and then click Restart:

12. The SSL Certificate has been successfully installed.
After the certificate is installed, you can check if it’s accurately installed using this tool: https://decoder.link/sslchecker.