This article shows how an SSL certificate can be uploaded through AWS CLI (Command Line Interface) to the following services:
- Identity and Access Manager (IAM)
- Amazon Certificate Manager (ACM)
- Elastic Load Balancing (ELB)
The necessary files you will need for a successful import are:
- Certificate issued for a particular domain name
- CA bundle of the issuing Certificate Authority
- Unencrypted (created without a password) private key.
To download the certificate and CA bundle from the user account panel, you can refer to this guide.
The private key is always generated along with the CSR code, and consequently, it needs to be retrieved from that very place (server, web-hosting control panel, online generator, etc.) where the CSR was created.
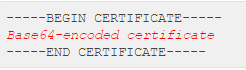
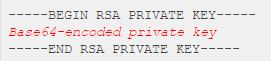
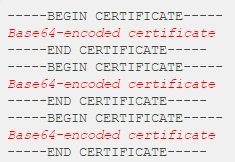
The certificate, CA bundle and private key must be PEM-encoded, meaning that the code inside the files should resemble the examples on the pictures below:
Certificate:
Private key:
CA bundle:
NOTE: At the time of writing of this article, AWS services support only RSA-based 1024 or 2048-bit private keys. However, since 1024-bit keys are considered to be weak, and the trusted Certificate Authorities do not issue such certificates anymore, the certificate that is to be used with AWS must be issued based on the RSA algorithm with the 2048-bit key pair.
Identity and Access Manager (IAM)
Although IAM provides an extensive scope of actions for AWS users access management, we will be describing the ones related to the certificate import process here.
To upload the certificate to IAM, use the following command:
aws iam upload-server-certificate –server-certificate-name certificate-name –certificate-body file://example.crt –certificate-chain file://example-bundle.crt –private-key file://example.key
The certificate-name value should be replaced with the custom name that would help to identify the certificate in future. It cannot contain any spaces and should consist of upper- and lowercase alphanumeric characters. You can also include any of the following characters: =,.@-
The parameters –certificate-body, –certificate-chain and –private-key refer to the names of the certificate, CA bundle and private key files respectively.
As a result of successful uploading, you will see the table in the command prompt containing the server certificate metadata: its path on the server, name, ID, ARN (Amazon Resource Name), upload and expiration date.

The corresponding page on the AWS CLI command reference portal describes the full list of options that can be used with the command described above.
There is also the command that allows retrieving and viewing the uploaded certificate. It should be run with the name of the certificate we would like to check:
aws iam get-server-certificate –server-certificate-name certificate-name
The result will be the PEM-encoded certificate, CA bundle, and the certificate’s metadata in the command line output.
The complete description of this command on the AWS CLI command reference portal can be checked here.
Also, there is an article in the AWS documentation dedicated to such operations like listing, renaming, deleting and troubleshooting server certificates.
Amazon Certificate Manager (ACM)
To import the certificate to ACM, run the following command in the command prompt adding the actual names of the certificate files to the example below:
aws acm import-certificate –certificate file://example.crt –private-key file://example.key –certificate-chain file://example-bundle.crt

If the import is successful, the command prompt will return the certificate ARN, a unique identifier used for further certificate management.
To replace the imported certificate with a new one, the command above should be invoked with the –certificate-arn parameter following the ARN value of the certificate which is to be replaced.
To display the list of the imported certificates’ domain names and the corresponding ARNs, there is the following command:
aws acm list-certificates
The complete list of currently available ACM commands and parameters can be checked on the related AWS CLI command reference page.
Elastic Load Balancing (ELB)
This section mainly describes the process of creating HTTPS listeners on the existing classic and application load balancers and updating an SSL certificate on a previously created HTTPS listener.
To proceed further, the certificate must be uploaded either to IAM or ACM already so that we can use the certificate’s ARN and the existing load balancer’s ARN in the process.
Classic load balancer
To allow the classic load balancer listening to the HTTPS traffic, we need to create the HTTPS listener and assign the SSL certificate to it. It can be done with the command below:
aws elb create-load-balancer-listeners –load-balancer-name my-load-balancer –listeners “Protocol=HTTPS,LoadBalancerPort=443,InstanceProtocol=HTTP,InstancePort=80,SSLCertificateId=ARN”
If you need to update the certificate on the already running HTTPS listener, use the following command:
aws elb set-load-balancer-listener-ssl-certificate –load-balancer-name my-load-balancer –load-balancer-port 443 –ssl-certificate-id NewARN
The NewARN value refers to the ARN of the new certificate that is required to be assigned to the listener instead of the previous one.
To get more information about the available commands, parameters and values available for the classic load balancer management, you can refer to the page on the AWS CLI command reference portal.
Also, the following article provides with additional steps and workarounds for the successful HTTPS listener creation and management.
Application load balancer
To create an HTTPS listener on the application load balancer, one would need to invoke the following command:
aws elbv2 create-listener –load-balancer-arn my-load-balancer-arn –protocol HTTPS –port 443 –certificates CertificateArn=my-certificate-arn –ssl-policy ELBSecurityPolicy-2015-05 –default-actions Type=forward,TargetGroupArn=my-target-group-arn
The my-load-balancer-arn and my-target-group-arn values can be obtained from running the “aws elbv2 describe-target-groups” command, which will return the information about existing load balancers and target groups in your AWS infrastructure.
NOTE: The ELBSecurityPolicy-2015-05 value for –ssl-policy parameter is predefined by default. It is the security policy that defines which ciphers and protocols are supported.
To re-assign the new certificate to the existing HTTPS listener, the following command should be used:
aws elbv2 modify-listener –listener-arn my-https-listener-arn –certificates CertificateArn=my-new-certificate-arn
The value that should be put instead of my-https-listener-arn to the command can be retrieved by running the “aws elbv2 describe-listeners –load-balancer-arn my-load-balancer-arn” command.
For more information on the application load balancer management, you can check this AWS CLI command reference page.
You can check how to create an HTTPS listener on the application load balancer in this article from the official AWS documentation.
Checking the SSL installation on the load balancers
When the HTTPS listener is successfully created or updated with the new SSL certificate, it is a good idea to check the configuration using available tools. Since Amazon’s elastic load balancing implies having several instances running simultaneously (with different IP addresses), it is convenient to use the SSLLabs server test to check all of them at once just by specifying the domain name and waiting a couple of minutes.