Have you heard about our installation service? Save time and effort by letting our experts set up your SSL for you.
In this guide, we will go through the CSR generation process on a server, operated under Webmin administration panel. The software used for demonstration is the following:
1. Ubuntu 16.04 LTS
2. Webmin 1.840 with Apache web-server 2.4.18
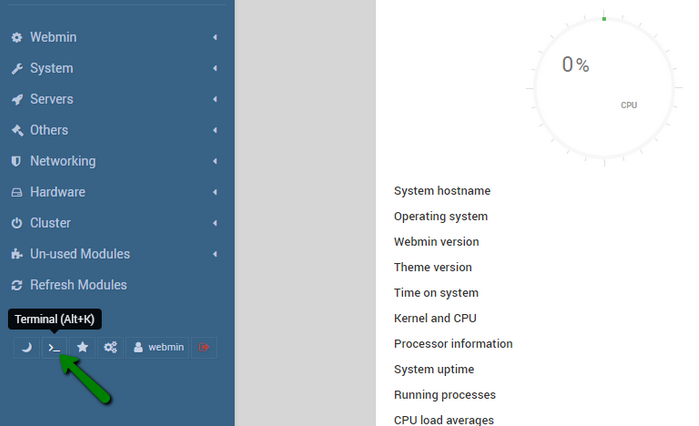
Firstly, we need to log into Webmin and open Terminal, pressing the button like on the picture below:

On the opened Terminal screen, we need to either type in or paste the OpenSSL command for CSR generation. The command below will generate the private key and the CSR, save them in the given location and display the CSR code on the screen:
sudo openssl req -new -newkey rsa:2048 -nodes -keyout /etc/ssl/example.com.key -out /etc/ssl/example.com.csr -subj /C=US/ST=Arizona/L=Phoenix/O=SSLs.com/OU=Support/CN=example.com; cat /etc/ssl/example.com.csr
Make sure to change the values highlighted in red in the following way:
-keyout /etc/ssl/example.com.key – the path and the filename to save the private key code.
NOTE: Please avoid putting the file with the private key into publicly accessible directories (the document root folders in other words), for example, “/var/www/html”, “/usr/share/example/html”, “/home/example/public_html”, etc., as the private key must not be disclosed under any circumstances due to security concerns.
-out /etc/ssl/example.com.csr – the path and the filename to save the CSR code
- C=US – 2-letter country code, compliant with ISO-3166-1 alpha-2.
- ST=Arizona – the name of the state or another geographical region within the country.
- L=Phoenix – the name of the city.
- O=SSLs.com – the company/organization name or just NA if there is no company.
- OU=Support – the name of the division/department within the company (not obligatory though) or NA instead.
- CN=example.com – the exact fully qualified domain name the certificate is going to be issued for – “example.com”, “www.example.com” or “sub.example.com”, for instance. In case of a wildcard certificate, it is necessary to prepend an asterisk to the domain name – “*.example.com” or “*.sub.example.com”.
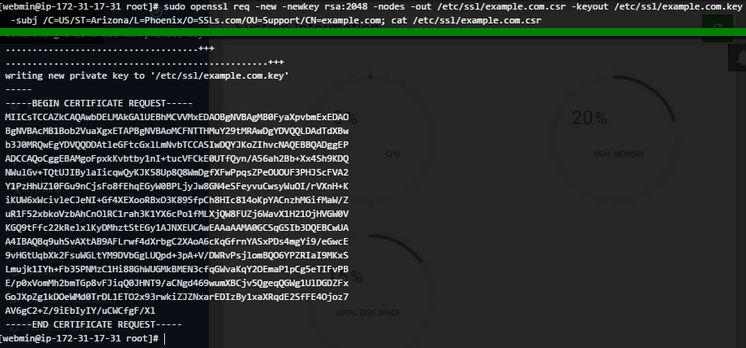
The picture below shows the command already entered and executed:

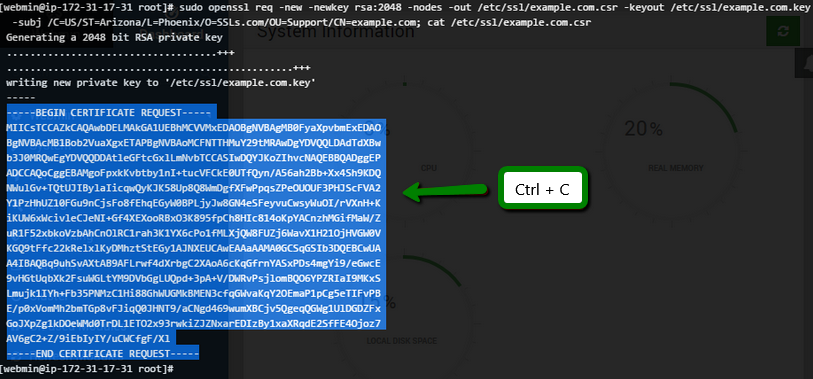
At this point, you can copy the CSR code enclosed with the —–BEGIN CERTIFICATE REQUEST—— and —–END CERTIFICATE REQUEST—– headers and start the SSL certificate activation:

If the activation page does not accept the CSR code and returns certain errors indicating that something is wrong with the CSR, you can decode the code here and see what exactly is incorrect in order to re-generate the CSR with these amendments.