Overwhelmed by SSL activation and installation? Our team of tech professionals can take care of all the hard stuff.
A CSR is an essential part of certificate issuance. If you need to activate your certificate, please generate a CSR on IIS 5&6 using the detailed instructions described below:
Generate keys and Certificate Signing Request:
- Select Administrative Tools
- Start Internet Services Manager
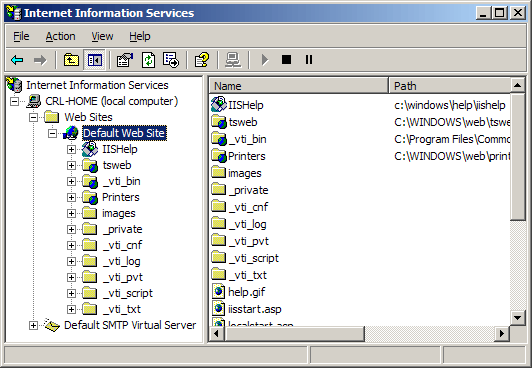
3) Right click on Default Website, then Select Properties for the website for which you are generating the CSR.
4) Right click on the Directory Security tab to open it.
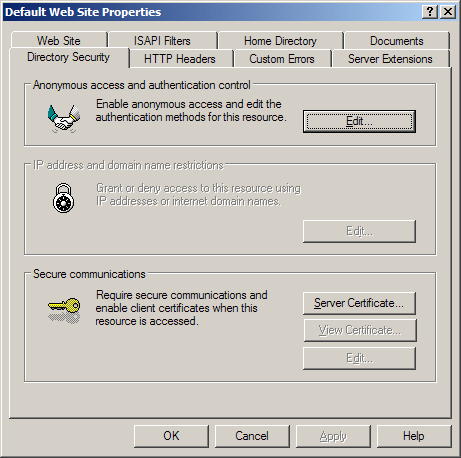
5) When you click Server Certificate, the following Wizard should appear:
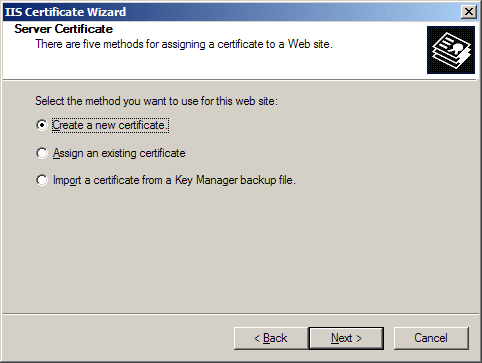
6) Tick Create a new certificate and click Next.
7) Select Prepare the request and click Next.
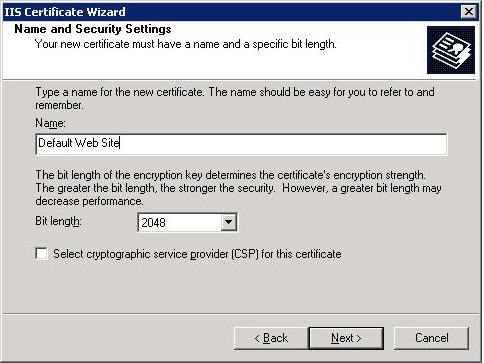
8) Provide a name for the certificate. This name is for your records only and should be easy to recognize and located in the system.
9) For Bit length, choose either 2048 or 4096 and then Click Next.
10) Fill in Organization and Organization Unit using your company name and company department. Click Next.
Note: If you have a Domain Validation certificate, you may choose NA for Organization and Organization Unit.

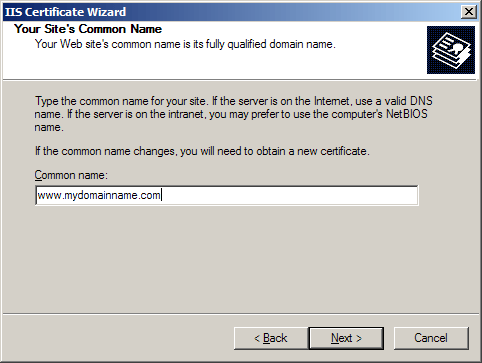
11) The Common Name field should be the Fully Qualified Domain Name (FQDN) or the web address for which you plan to use your IIS SSL Certificate. Details on how to choose a common name can be found here.
12) Once a common name is entered, click Next.
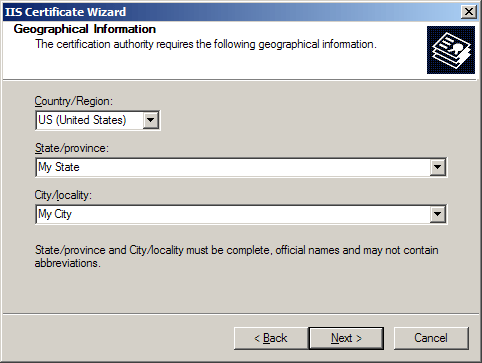
13) Enter your Country, State, and City, then click Next.
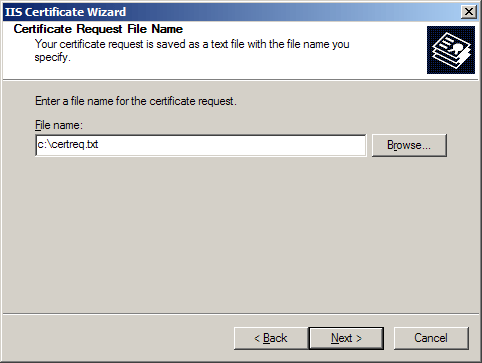
14) Enter a name for the file and a location to save your CSR, then click Next.
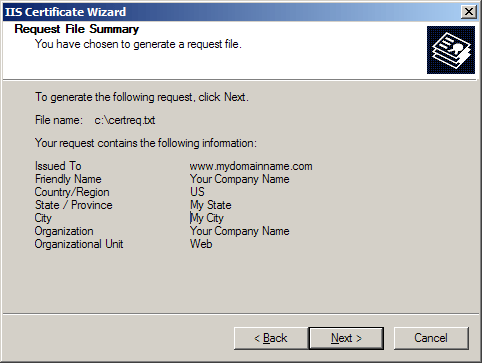
15) On the next page, review the details you have entered. Click Back to make any corrections, if necessary. Click Next.
16) Make sure that you include the CSR with the following tags:
—–BEGIN CERTIFICATE REQUEST—– to —–END CERTIFICATE REQUEST—– and click Next.
17) Confirm your details in the enrollment form to complete the process.
To save your private key:
- Go to Certificates snap in in the MMC
- Select Requests
- Choose All tasks
- Select Export
It is highly recommended that you back up your Private Key, as this information is needed for your certificate installation and should be kept private.