Domain setup
Our security Certificates can be issued for an FQDN (fully qualified domain name) only. So the first thing you should do is assign your domain either to the Synology DDNS service or to the corresponding IP address.
Connect your domain to the free DDNS service through a CNAME record. Alternatively, you can point the domain to your server static IP with an A record.
CSR code generation
This is the first step of the SSL certificate activation process. Your website name and other contact details for the certificate will be embedded into the code.
The most important thing is to have the CSR generated on the hosting server end. This way the Private key will be stored on the same server, and later can be conveniently pulled from there during SSL installation.
On Synology NAS, you’ll need to download and save the Private key on your PC right after the CSR code generation. Then you can freely use our auto-activate option for any certificate except for the Multi-Domain type.
Otherwise, follow the steps below to generate the CSR on your Synology NAS instance.
Important note: In this guide, we’ll use testcert.us as an example. Please use your own website name instead when following the steps outlined below.
Step 1: Certificate Panel
Log into your server, open the Control Panel menu and select the Security icon.
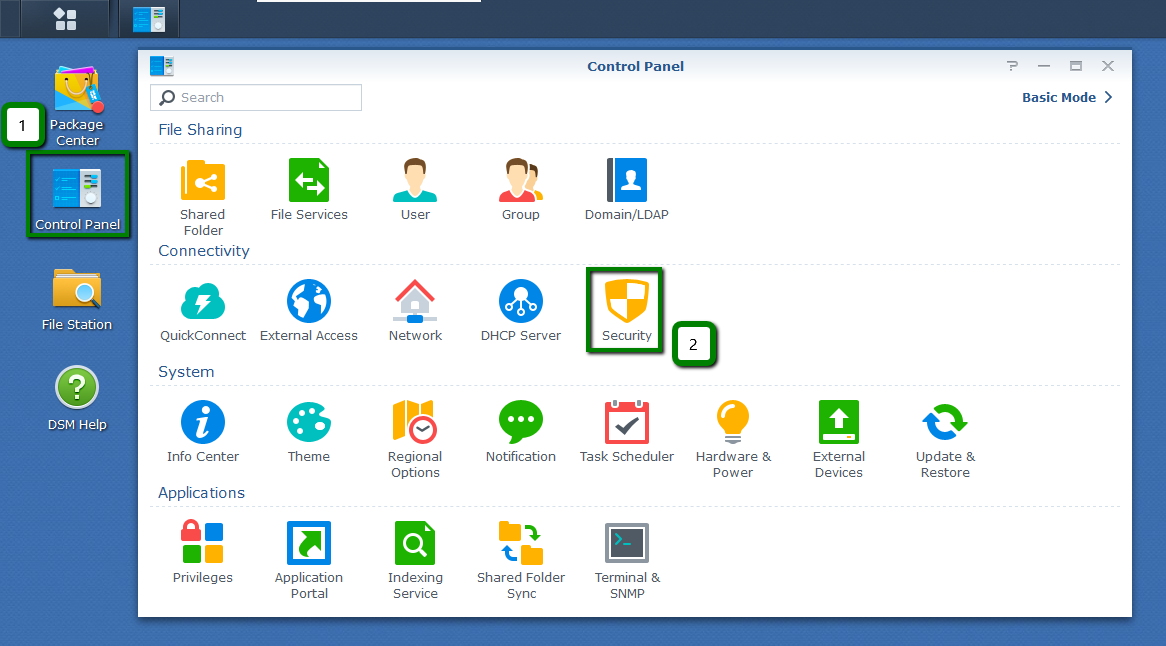
Open the Certificate tab at the top and click CSR. In the pop-up window, check the Create certificate signing request (CSR) radio button and hit Next.

Step2: Specify CSR details
You will be prompted to enter your future SSL details on the next screen. These details will be used by the Certificate Authority to generate the certificate for your website. Please use the below picture as an example:
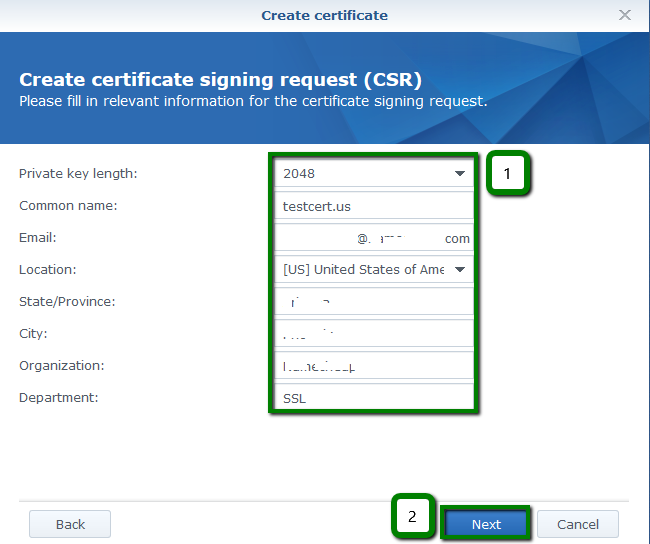
Click Next when you’re done.
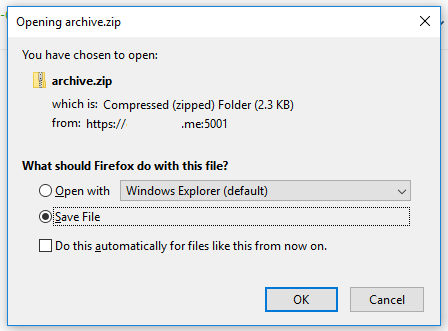
Step 3: Save CSR & Private key
Your CSR code and the matching Private key have been generated. Use the Download button to save the archive.zip file containing both codes on your computer.
Please note: The matching Private key is essential to install the certificate on the server. The Synology server doesn’t store the CSR code and Private key on their platform, so be sure to keep the Private key safe on your computer for when you need them.

Step 4: Use your CSR
Navigate to the folder you selected to store the zipped archive and extract the CSR code (the file with .csr extension) and Private key (file with .key extension) from it.
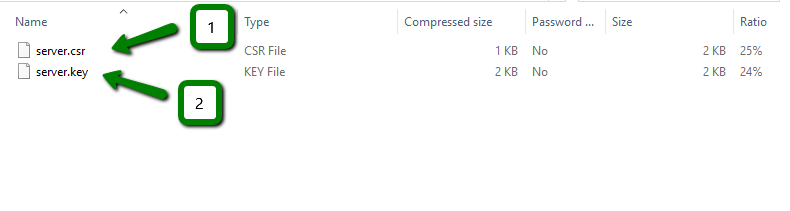
While keeping the .key file on your PC for future use, open the .csr file using any suitable text editor, like Notepad. Next, copy the text code along with these headers: —–BEGIN CERTIFICATE REQUEST—– and —–END CERTIFICATE REQUEST—–. You’ll need to put this code in the required box during the SSL activation.