Exchange 2010
Once you have your PFX file created, you can install it on an Exchange 2010 server in a few steps:
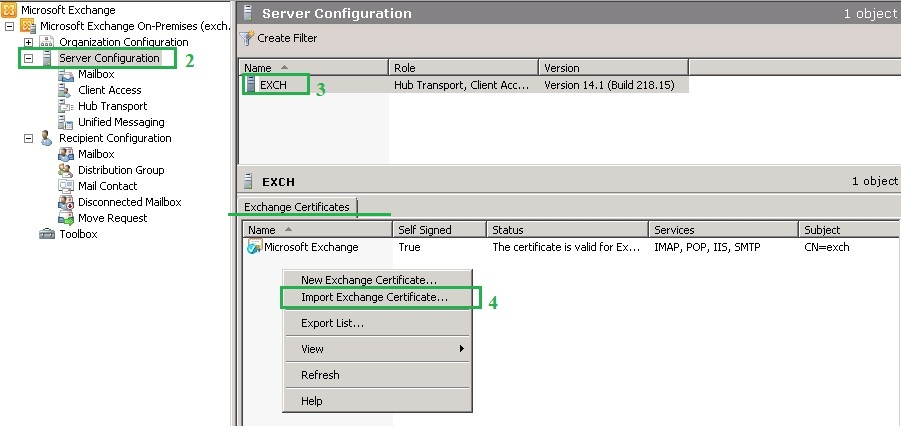
- Open up the Exchange Management Console (EMC);
- Click on Server Configuration located in the left-hand menu;
- On the right side, select the server you wish to secure;
- Right-click on the blank area in the Exchange Certificate field and select Import Exchange Certificate.
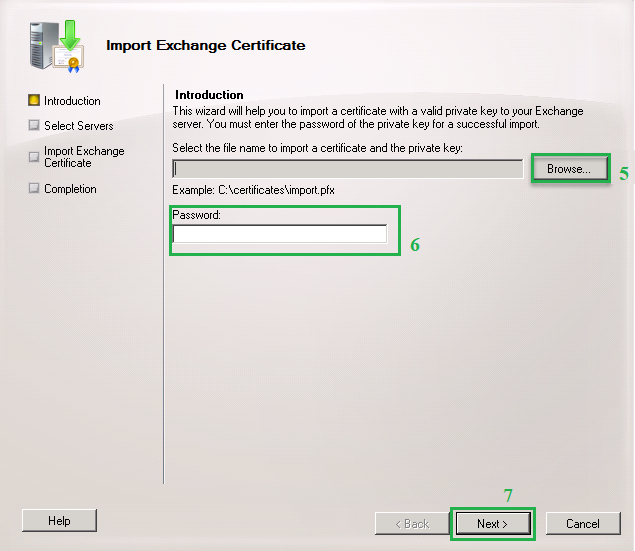
After that, the “Import Exchange Certificate” Wizard will pop up.
- Click Browse and select your certificate;
- Then, enter the password (created when you converted the SSL files to .pfx) to the field below;
- Click Next.
On the next page, use the +Add option to import the same SSL to a different server.
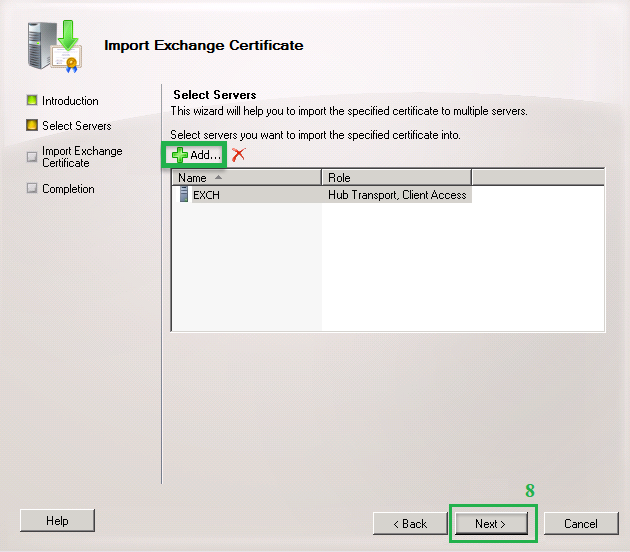
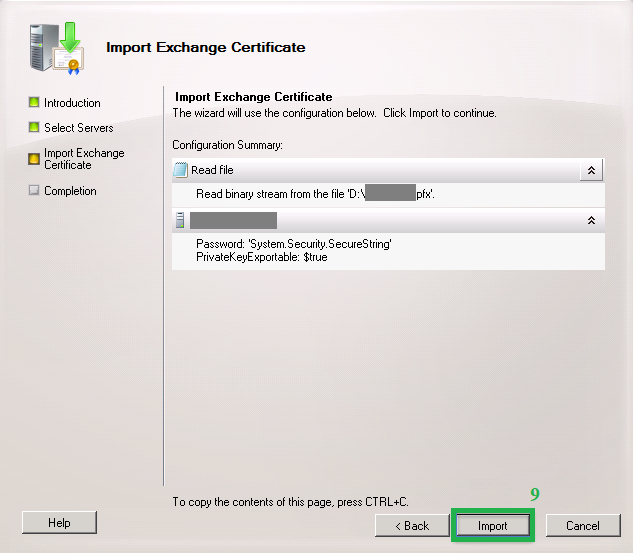
- Press Next again to open the summary page;
- Here, you can check the data entered. If everything is correct, click the Import button.
Import completed! Now you can assign services to your SSL. For that, do the following:
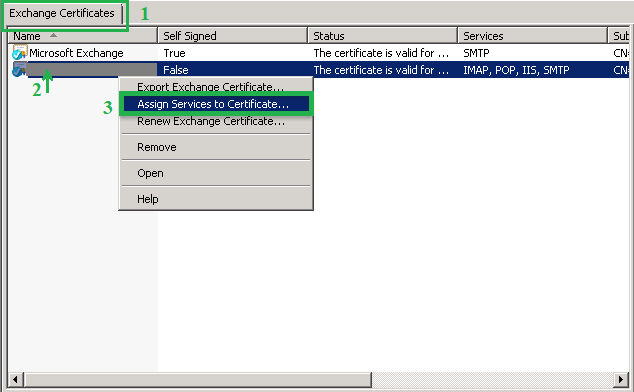
- Navigate to the Server Configuration >> Exchange Certificate field again;
- Right-click on the imported SSL;
- Select Assign Services to Certificate;
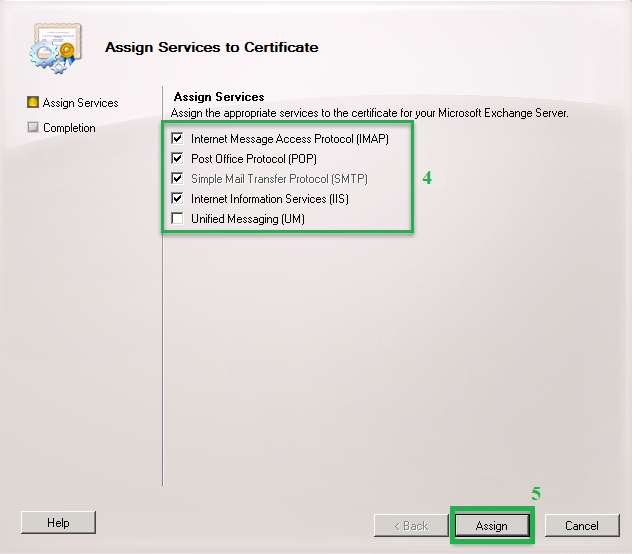
- The next step is to tick the services you would like to secure with the certificate. Usually, IIS (Outlook Web Access, Active Sync) POP3 and SMTP are selected by default;
- When you’re done, click Assign;
- After that, a pop-up window with a warning will appear asking for your confirmation to remove the services assigned to the default SSL and add them to the new certificate. Press Yes to proceed;
- Close the wizard by clicking Finish.
And you’re done. The services you assigned to the certificate should now appear in your Exchange Management Console.
You can check if the SSL installation worked with this tool: https://decoder.link/
***
Please note that a Wildcard certificate can only be installed on Exchange 2010 if the CSR code was generated on this same server. Otherwise, the system will not allow the installation.
The CSR code for a Wildcard can be generated by ticking the “Enable wildcard certificate” option. You can find the process described in more detail here.
Exchange 2013 / 2016
When the .pfx file is ready, follow the steps below to install it on your server.
- Open the Exchange Admin Center (EAC) panel;
Note: You can access the EAC in a web browser on the Exchange server itself at https://localhost/ecp. If your Exchange 2016 is in a coexistence setup and the mailbox is on the Exchange 2010 server, use https://localhost/ecp/?ExchClientVer=15 to open EAC. - Navigate to the Servers section and press Certificates;
- The specific server will be selected a bit later. For now, just click “…” (More) and select the Import Exchange Certificate option;
- In the installation wizard that appears, select your .pfx certificate file;
- Enter the password (that you created during the conversion of the SSL files to .pfx) to the Password field and click Next.
To assign SSL to the specific server, do the following:
- Press “+”;
- Select the server where you want into install your certificate;
- Click Finish.
The SSL import is complete. You can check the SSL file by opening the Servers section, where it will be listed in the Certificates tab with a blank space for a name.
Now you can assign the certificate its Exchange services by following these steps:
- Select your certificate in the Certificates list and press Edit;
- In the left area, click on Services;
- And on the right, mark the services you would like to secure with your SSL;
- Click Save;
- After that, you may receive a warning indicating that you are going to replace the existing certificate with another one. In most cases, this existing certificate is a self-signed one installed by default so you can ignore the message and click Yes.
If another trusted certificate was previously installed on your server, you can also proceed with the replacement.
You can find more details on installing an SSL certificate on Exchange 13 in this guide.
The certificate should now be installed. To check if it worked, use the following tool: https://decoder.link/