Want your site secured fast but just don’t have the time? Our team can install your SSL for you.
Once the SSL certificate is activated, validated and issued, it is time to install it on the server. To prepare the correct files for the installation, make sure to download a compressed .zip archive from your account or from the email sent by Comodo (now Sectigo) and unzip it on your local computer. You will need the files called example_com.crt and example_com.ca-bundle, meaning that example_com is your domain name here.
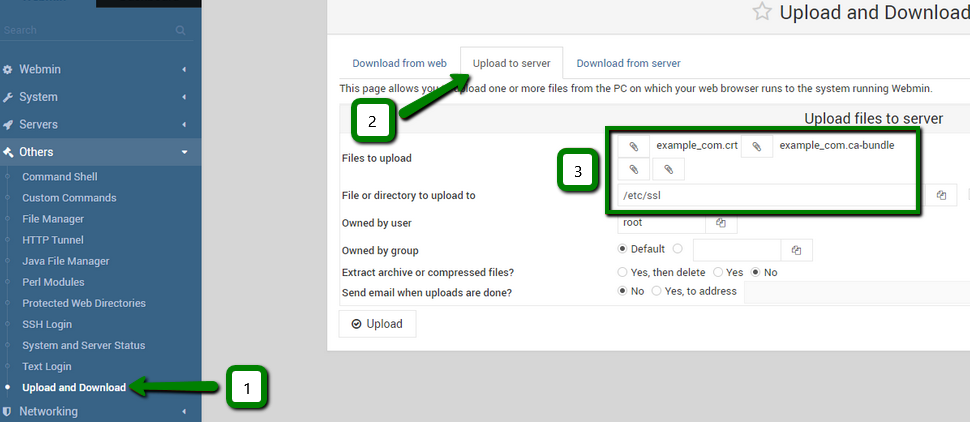
Firstly, you will need to upload the above mentioned files to Webmin. Click Others to expand the menu on the left and then Upload and Download. Choose the Upload to server tab in the main window, then select the files to upload, specify the path to store them and click Upload:
Now let’s get to configuring Apache using Webmin.
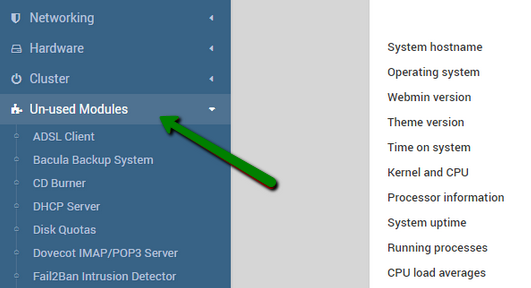
TIP: If you have not installed Apache so far, you can find and install it in the Unused modules menu in the left-hand panel:
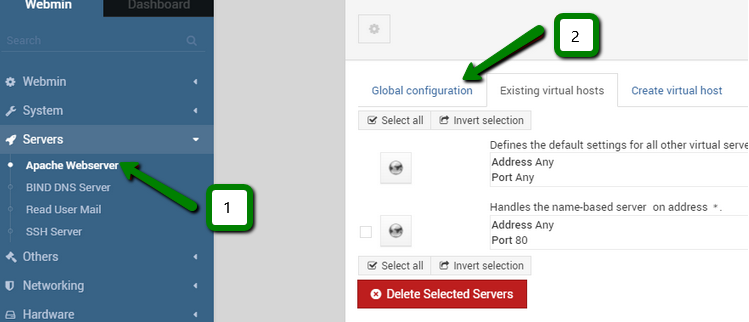
Click the Apache Webserver entry in the Servers menu in the same left-hand panel and choose the Global configuration tab:
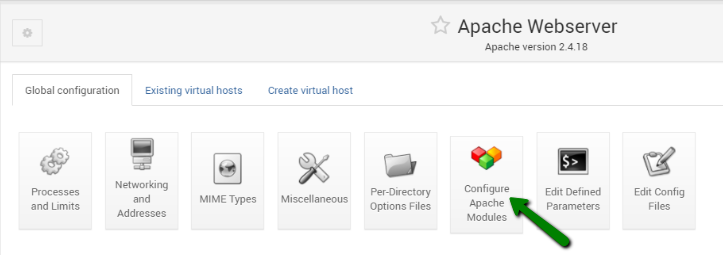
Press the Configure Apache Modules icon:
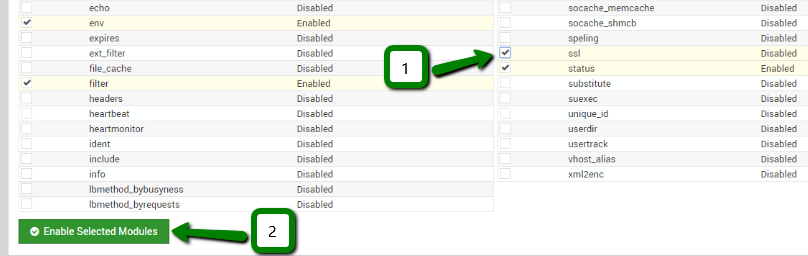
In the list of Apache modules, find the ssl entry, check the box on the left and press the Enable Selected Modules button:
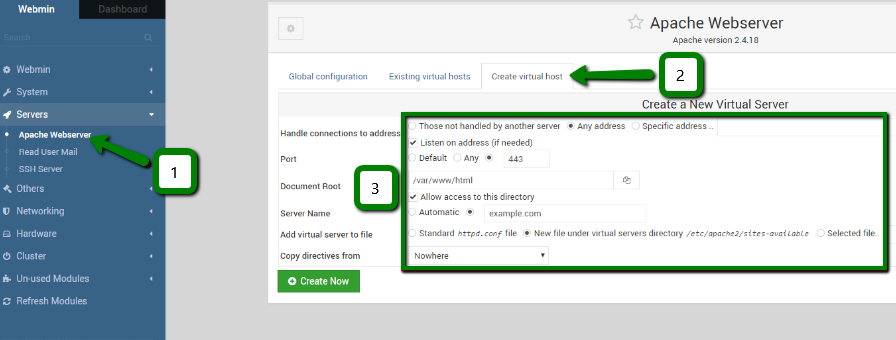
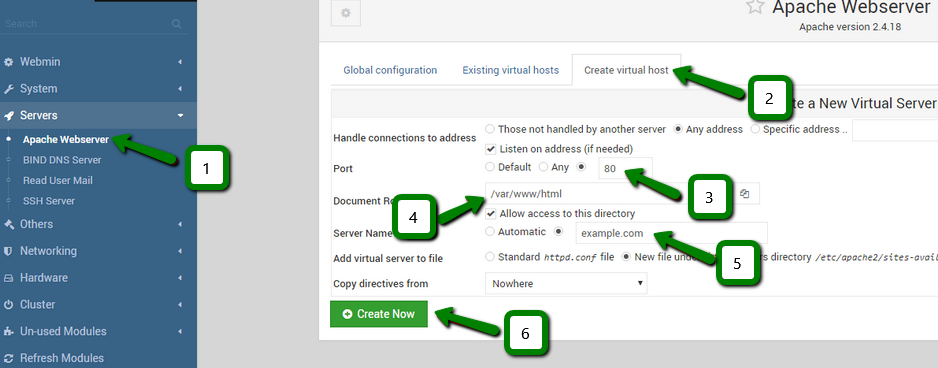
After a few seconds you should be prompted to the Apache Webserver’s main page. Choose the Create virtual host tab there.
Specify port 443 (the default one) after putting the radio button near the blank field in the Port section, enter the path to the document root folder in Document Root and type in the domain name in the Server Name section. Then press the Create Now button to add a new virtual host:
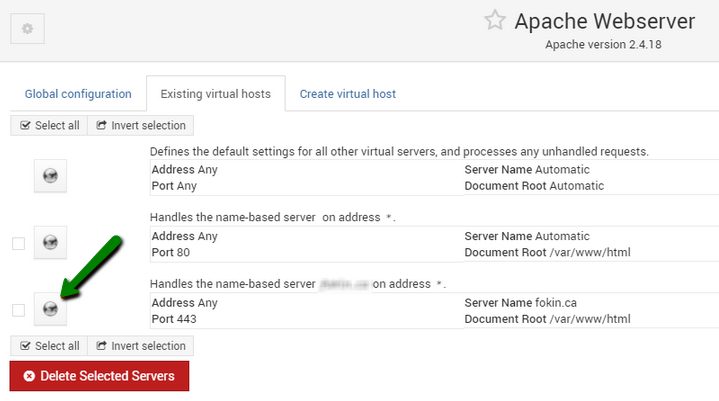
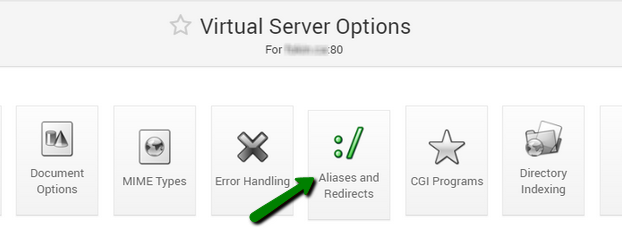
In the newly opened Existing virtual hosts tab, click on the globe button next to the virtual host that we have just created:
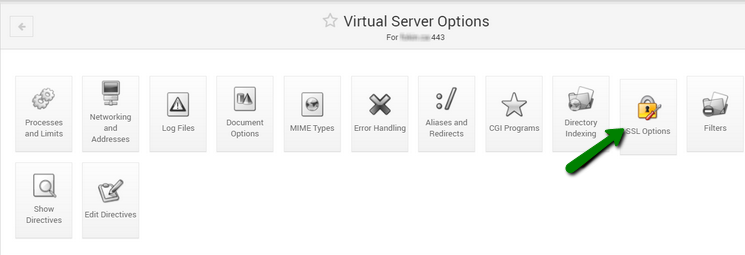
After that, find and click on the SSL Options icon in Virtual Server Options:
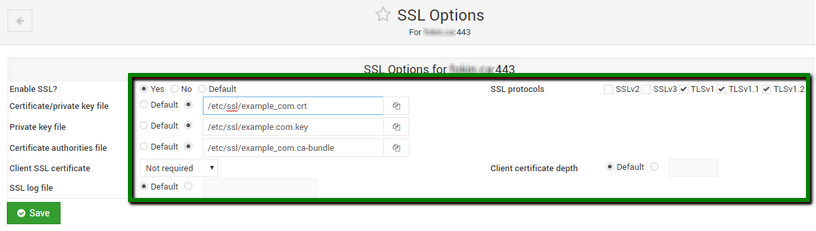
Adjust the SSL options in the following way:
Enable SSL? – select Yes
SSL protocols – make sure to uncheck SSLv2 and SSLv3 as these protocols are considered to be unsecure
Certificate/private key file – the path to the uploaded example_com.crt file Private key file – the path to the private key file that was initially generated with the CSR code; used for the certificate activation
Certificate authorities file – the path to the uploaded example_com.ca-bundle file.
Press the Save button to update the SSL settings:
In order to apply all of the changes we have made so far, we need to restart Apache. To open the needed page, press the Bootup and Shutdown entry under the System menu in the left-hand panel, find the apache2 service and check the corresponding checkbox on the left:
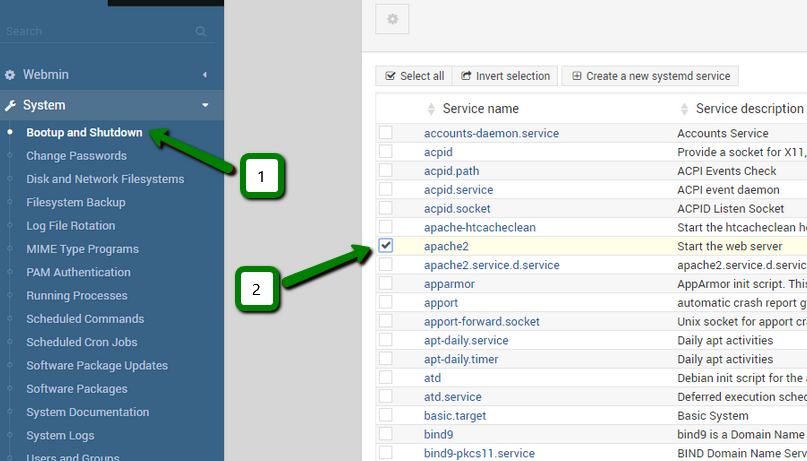
After that, scroll down to the very bottom and press the Restart button:
That’s it! After the successful Apache restart you can check the SSL certificate installation with the help of this tool.
If you would like your visitors to access the website through https:// automatically instead of http://, you can enable the redirection in the following way.
Add a new virtual host in Apache Webserver >> Create virtual host, like we did it previously, but specifying port 80 (default for regular http://) this time:
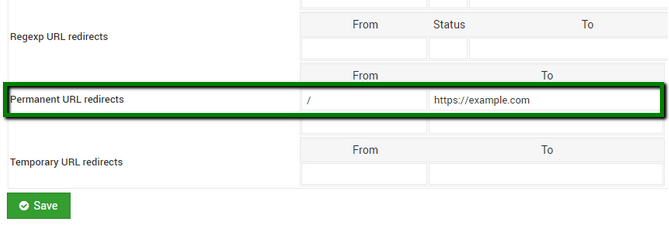
In the Permanent URL redirects section, add “/” to the From field, in order to apply the redirection to the whole website, and “https://example.com/” for To field, replacing example.com with the domain name the SSL certificate is issued for. Then press the Save button and restart Apache in the same way as it was described earlier in this guide:
The redirection should become effective now. To check whether it works, you can either access the website via http:// in a web browser or use this tool.