Overwhelmed by SSL activation and installation? Our team of tech professionals can take care of all the hard stuff.
CSR is a plain text file which contains common and alternative hostnames and administrative details of a certificate encoded for a Certificate Authority use.
Follow the instructions below to generate a CSR in WHM for your certificate activation.
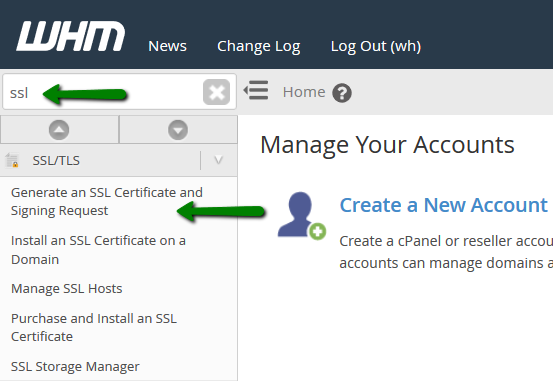
1) Log in to your WHM control panel
2) In the SSL/TLS section, click Generate an SSL Certificate Signing Request.
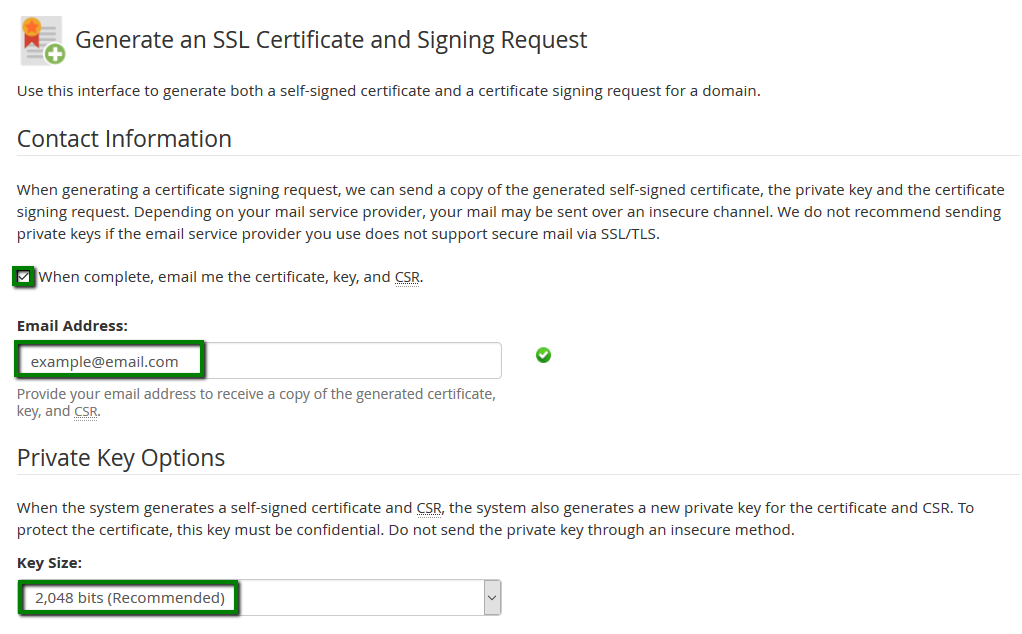
3) On the new page enter the requested company information:
Important: It is obligatory to fill in all the fields (except for Passphrase). Only alphanumeric characters must be used. If not, it is possible that a Certificate Authority will reject the CSR and certificate activation will fail.
Note: Check the box When complete, email me the certificate, key, and CSR in order to get your CSR, self-signed certificate and private key to the email address you mention in the field Email address.
Email. The correct and accessible contact email address should be entered here so that a Certificate Authority can use it to verify domain ownership.
Key size. There are two options: 2048 and 4096.
Generally, any of them can be chosen.
As for 2048 key size, it is considered secure nowadays, however if you would like to have a higher level of security, choose 4096 key size.
Keep in mind that a bigger key size slows down establishment of an SSL/TLS session and increases load on your server’s central processor unit.
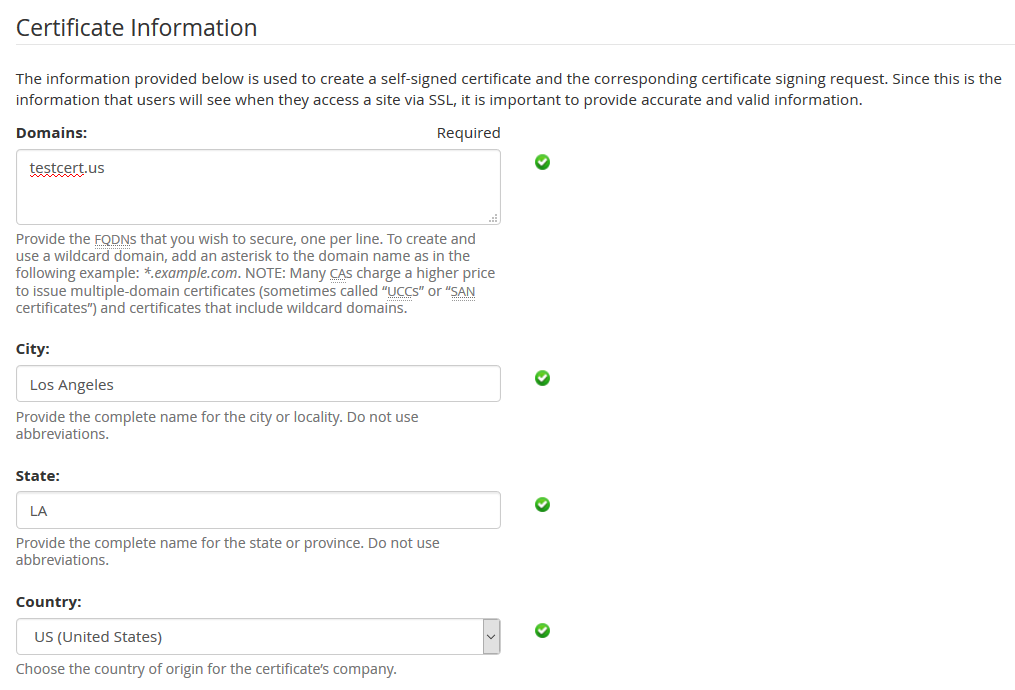
Domains. The Common Name is a fully-qualified domain name for which you are going to use your certificate, for instance, the area of your site you wish customers to connect to using SSL. Example: domain.com or www.domain.com.
If the Web address to be used for SSL is sub1.example.com, ensure that the common name submitted in the CSR is sub1.example.com.
If you have a Wildcard certificate, the common name for your certificate should be the following: *.example.com.
Note: Comodo (now Sectigo) certificate ordered for example.com is issued, signed and works both for example.com and www.example.com. And vice versa: if you order a certificate for www.example.com, it will be issued for both www.example.com and example.com.
City. Name of the city in which your organization is registered/located should be listed here. Do not use abbreviations.
State. Name of a state or province where your organization is located. Enter the full name of the state or province.
Country. The country where your organization is registered should be selected.
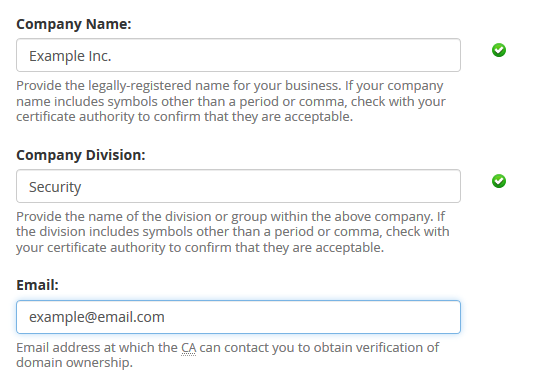
Company Name. The name of the company you issue certificate for should be entered.
Company Division. This field is used to differentiate between divisions within a company. For instance, Billing or Information Technologies.
Note: If you have a certificate with domain validation, it is not necessary to specify Company Name and Company Division. However, the fields must be filled in, do not leave them blank, put there NA instead.
Note: It is not obligatory to fill in the field Passphrase. It is created for the challenge password which used to be a shared secret between a certificate applicant and a Certificate Authority. This feature is obsolete nowadays and is not required for your SSL issuance.
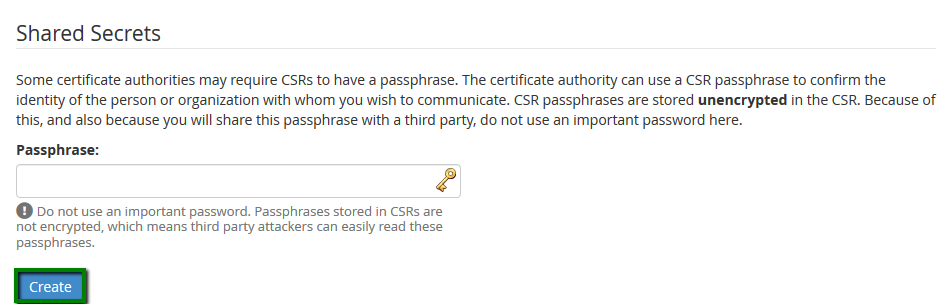
4) Click Create.
5) On the next page you will see three fields: Signing Request, Certificate and Private Key.
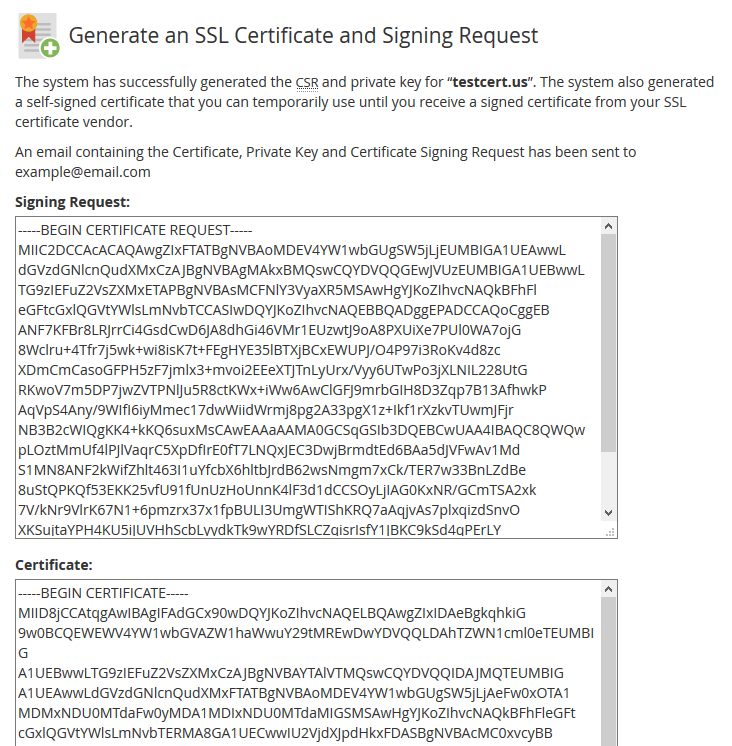
Signing Request. This is a CSR (Certificate Signing Request) which is needed for your certificate activation on ssls.com.
Certificate. It’s a self-signed, non-trusted certificate issued for your domain. It will not be used further.
Private Key. This is a key necessary for decoding during SSL/TLS handshake once your certificate is installed. Keep in mind that the private key should be saved as it is required for installation of the certificate on the server. Do not give it away to anyone.
Now you have your CSR and there’s only one little thing left is to activate your certificate at https://www.ssls.com/user/certificates.