Want your site secured fast but just don’t have the time? Our team can install your SSL for you.
Once your certificate is issued and sent to you via email, you are ready to install your certificate on WHM (Web Hosting Management).
The following steps should be followed in order to perform the installation:
1) Log in to your WHM account.
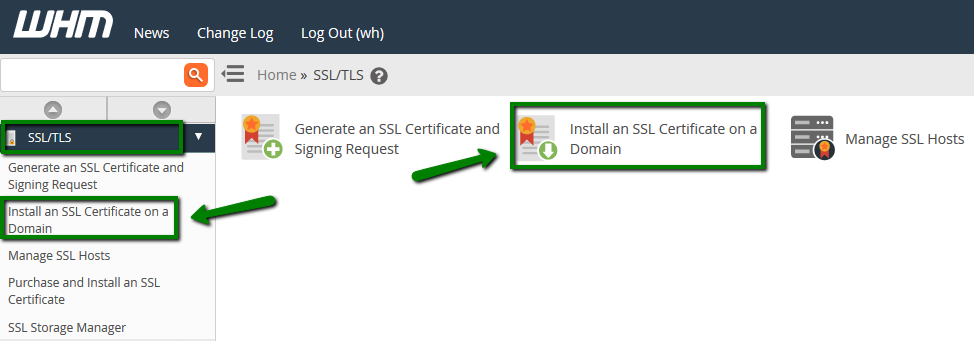
2) Mouse over SSL/TLS section and click Install an SSL Certificate on a Domain.
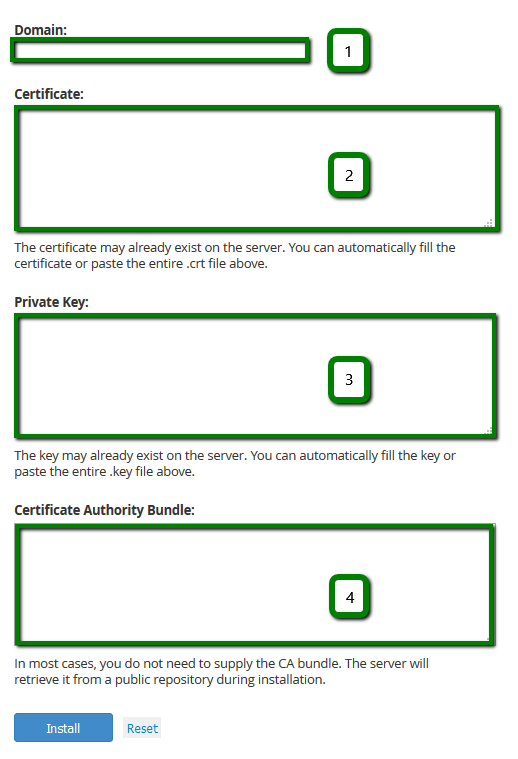
3) In a new window the following boxes will be available:
– Domain (1)
– Certificate (2)
– Private Key (3)
– Certificate Authority Bundle (4).
4) Put the domain (or subdomain) the SSL certificate should be installed for in the Domain field.
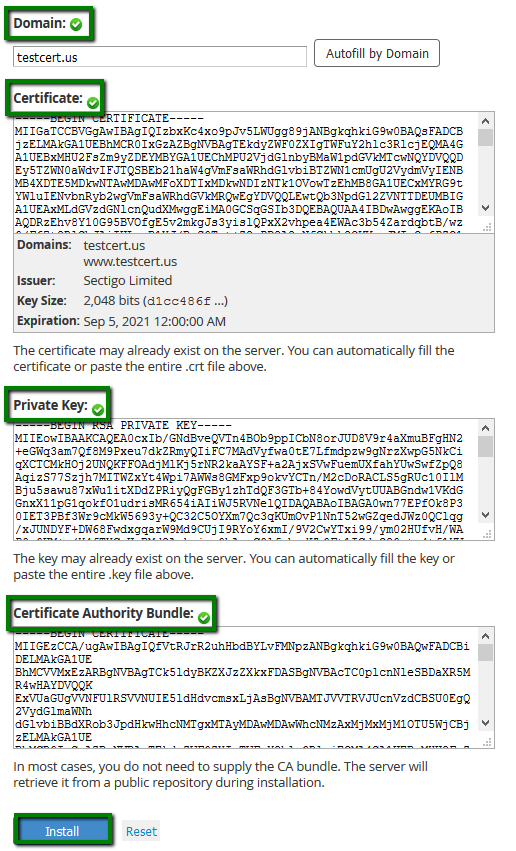
5) Fill in the Certificate field with the certificate which was issued for your domain/ subdomain.
Note: The certificates issued by Comodo (now Sectigo) are sent in the zip file. In order to get the file of your certificate, it is necessary to unzip the file, locate the file named as your domain/subdomain and open it with any text editor available in your computer. Once done, copy and paste the content of the file into the box.
6) Fill in the box Private Key with the key that has been generated along with the CSR you have used for the activation of the certificate on our site. This is the decoded text in tags —–BEGIN RSA PRIVATE KEY—- and —–END RSA PRIVATE KEY—-. Neither Certificate Authority, nor we have your Private Key, it is possessed by you solely.
Once your server certificate is pasted, the box Private Key can be auto-filled only if you generated the CSR using WHM in the same account. If the Private Key box is not filled automatically, paste it into the box manually.
7) Fill in the box Certificate Authority Bundle with the CA certificates that are usually sent to you along with the certificate once it is issued.
Comodo CA (Sectigo CA) certificates are sent in a .zip file. If you have a file with the extension *.ca-bundle in your zip, paste its content into Certificate Authority Bundle box. They can be sent in different files. Keep in mind that CA certificates differ depending on the type of SSL certificate. All CA certificates should be pasted in the correct order into the field Certificate Authority Bundle.
Use this page in order to get the CA bundle you need for your certificate.
8) Once you filled all the fields in, click Install.
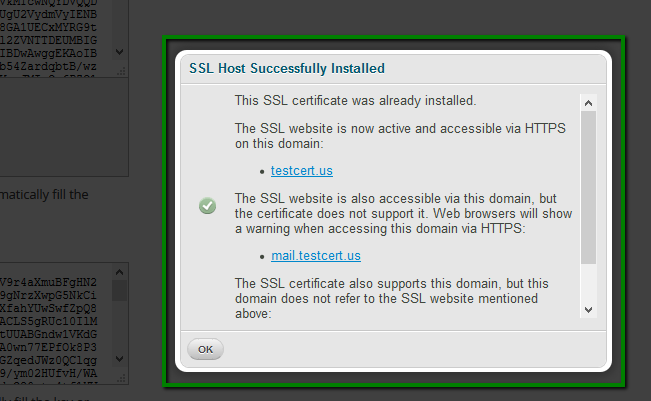
9) The following message will be displayed if the certificate is installed correctly: “You have successfully configured SSL. The SSL website is now active and accessible via HTTPS of this domain: *example.com*”.
Test your SSL certificate by using a browser to connect to your server. Use the https protocol directive. For example, if your SSL was issued to example.com, enter https://example.com into your browser.
The installation of your certificate can be also checked here: https://decoder.link.