Take the stress out of SSL installation and let our tech experts take care of it!
Certificate Request generated on IIS
SSL installation in IIS 10 requires one certificate file with the .p7b (or .cer) file extension. You may either download the issued certificate in the email delivered by Comodo (now Sectigo) or download it in your SSLs.com account following these instructions.
In order to install the certificate, please follow the steps below.
Upload your Certificate
- Press Win + R and type “inetmgr” in the appeared window to run the Internet Information Services (IIS) Manager.
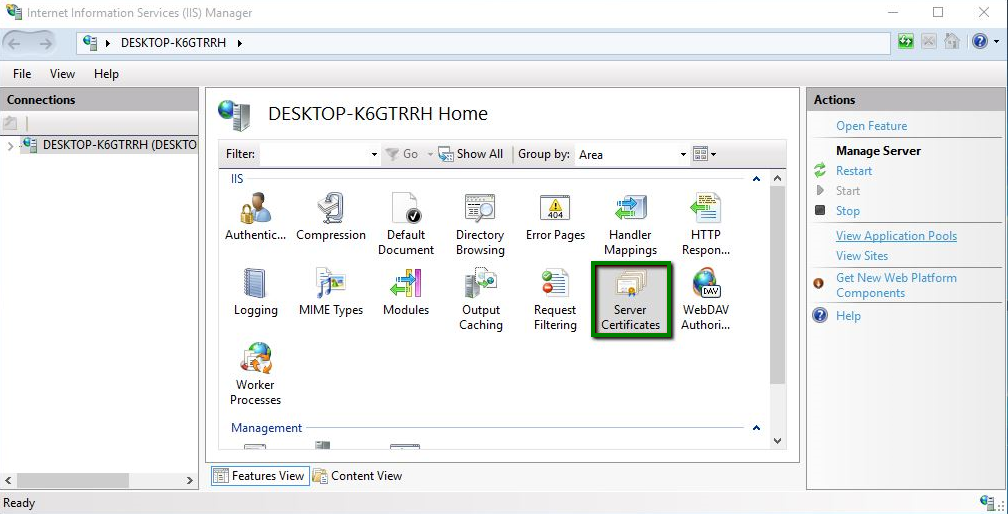
- On the IIS Manager home page, locate the Server Certificates icon and double-click it:
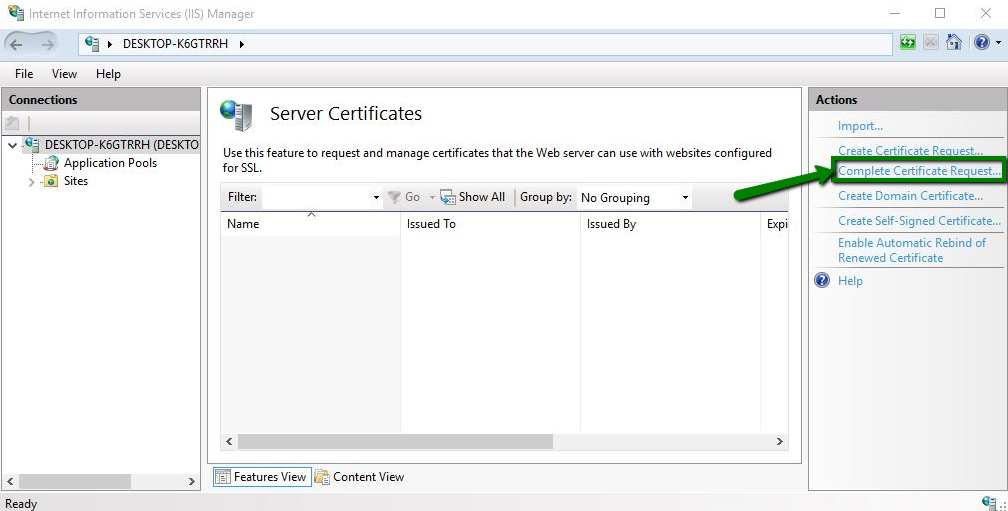
- Locate the Actions panel on the right side and click Complete Certificate Request:
- In the Specify Certificate Authority Response window, perform the actions below.a) In the File name containing the certification authority’s response field, browse the file system to select your .p7b (or .cer) certificate.
b) In the Friendly name field, specify any name that will help you to identify the certificate among other files. It is best to submit the actual domain name of the certificate.
c) In the Select a certificate store for the new certificate field, leave the default value Personal.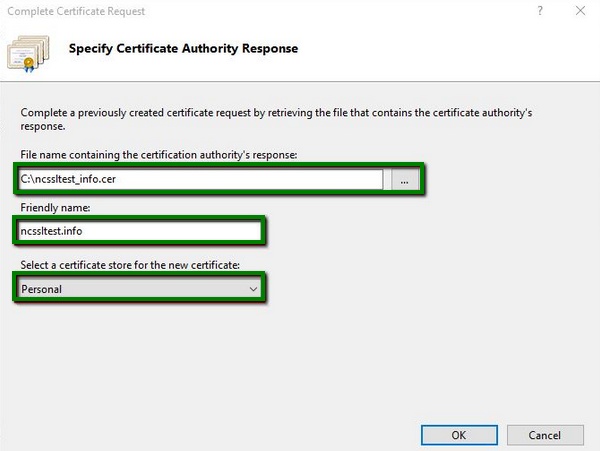
- Click OK to import the certificate to the server storage.
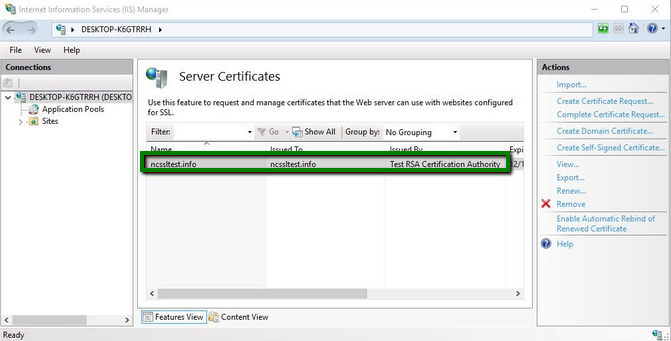
- Once the import is completed, in the Server Certificates window, you will see a new entry associated with the imported certificate:
Bind the Certificate
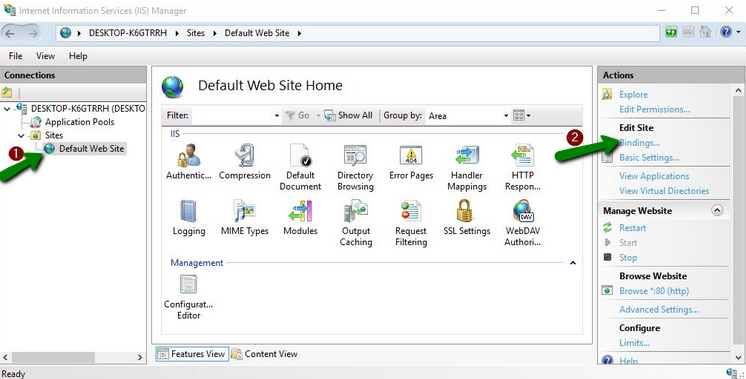
- Assign the certificate to your website by expanding the Sites subsection in the Connections menu on the left and select the corresponding site. Then, in the Actions panel on the right side, locate the Edit Site menu and select the Bindings option:
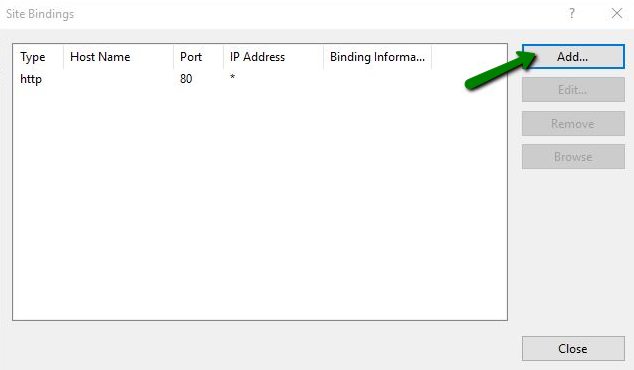
- On the right side of the Site Bindings window, click Add:
- In the Add Site Binding window, modify the fields as below:a) In the Type field, select https.b) In the IP address field, select your website’s IP address or All Unassigned.c) In the Port field, specify 443 (default).
d) In the SSL certificate field, select the previously imported certificate, which can be identified by the friendly name:
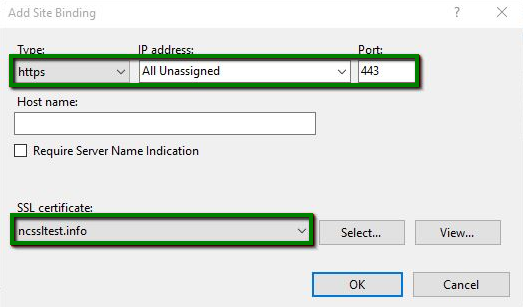
NOTE: The Require Server Name Indication box needs to be checked if there are multiple SSL certificates on the server.
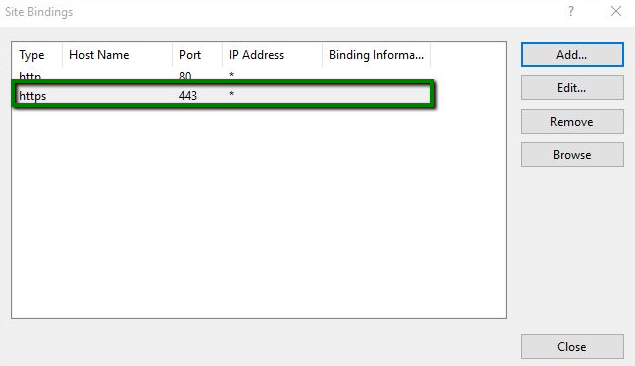
- Click OK in order for the new https entry to appear in the Site Bindings window:
That’s all – the certificate should now be installed and the website should be accessible via HTTPS.
The SSL installation status can be checked online via the SSL checker at https://decoder.link/sslchecker.
Certificate Request generated outside IIS
If the “Create CSR in-browser” option was chosen during the SSL activation, or the CSR code was generated elsewhere outside the IIS server, it is necessary to generate a PFX file containing the certificate, CA bundle, and private key, and use it for the import in IIS.
Check the details in our step-by-step guide regarding this process.