Want your site secured fast but just don’t have the time? Our team can install your SSL for you.
Certificate Request was created on your IIS server
After the certificate is activated, validated and issued, it needs to be installed by completing the request generated previously with the file received from the Certificate Authority. The process is described below.
Complete Certificate Request
- Download the certificate in PKCS#7 format in your SSLs.com account and upload it to the server. The certificate can be also downloaded from the email received from the CA. Please unzip the archive and find the .p7b/.cer certificate file there.
- Open Internet Information Services (IIS) Manager and double-click on the Server Certificates icon.
Then click on Complete Certificate Request in the Actions section:
- On the next screen it is necessary to fill in three fields:
1) File name containing the certification authority’s response – full path to the .p7b or .cer certificate file received from the Certificate Authority. It can be found the file system by clicking on “…” button;
2) Friendly name – general name for a certain certificate request. The domain name should be specified here to avoid confusion with other requests;
3) Select a certificate store for the new certificate – select Personal from the drop-down menu.Once all fields are filled, click Ok. Now the certificate will appear in the Server Certificates storage.
Set up the Bindings
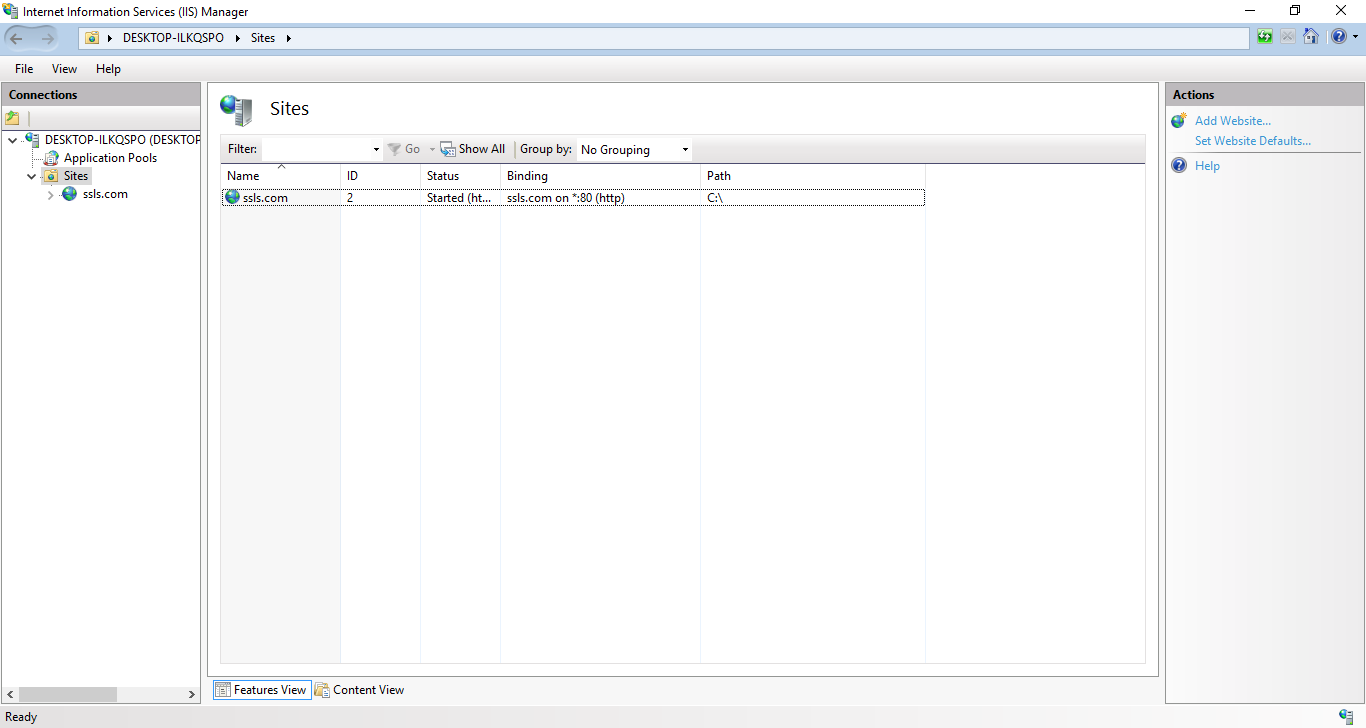
- After that, it is necessary to create a binding for the website to be available via HTTPS. Go to the Sites folder in the Connections section in the left part of the screen and double-click on the necessary website:
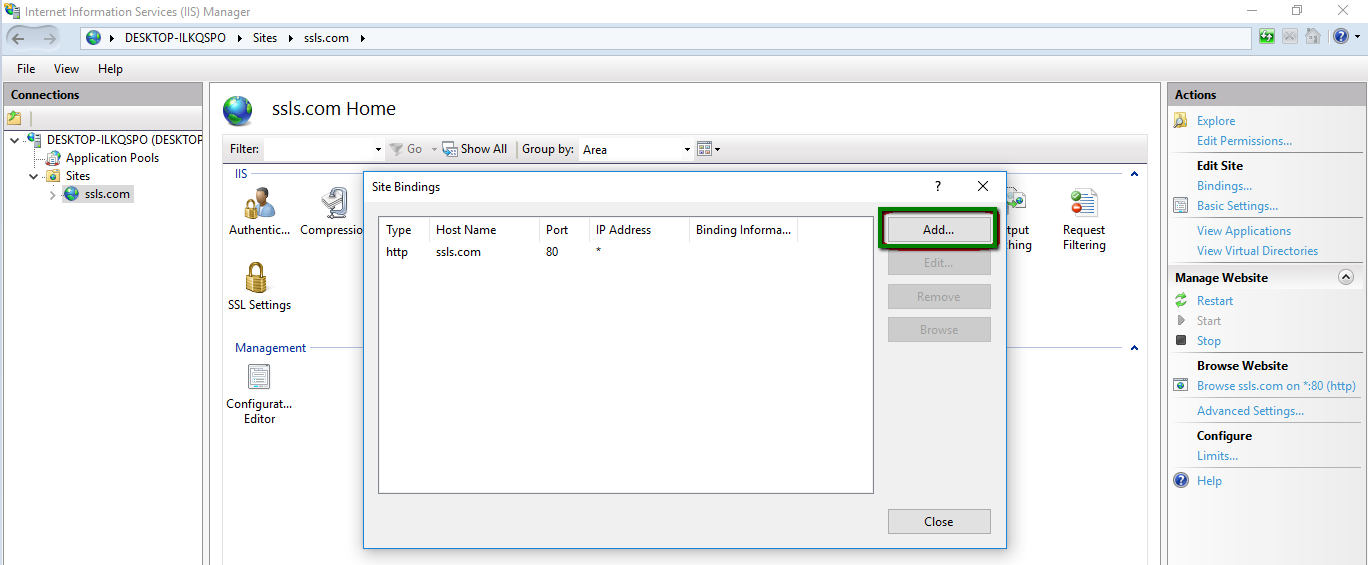
- In the right corner of the screen, click on the Bindings button in the Actions section. In the new Site Bindings window, click Add…
- Fill in the following fields in the Add Site Binding menu:
1) Type – select https from the drop-down.
2) IP address – choose All Unassigned or choose IP address from the drop-down.
3) Port – specify a custom port number for secured connection, or use the default port 443.
4) SSL certificate – select the completed certificate request by its friendly name.It is recommended to check the Require Server Name Indication box as it allows multiple SSL certificates to be installed on the server. Once all the necessary information is specified, click Ok.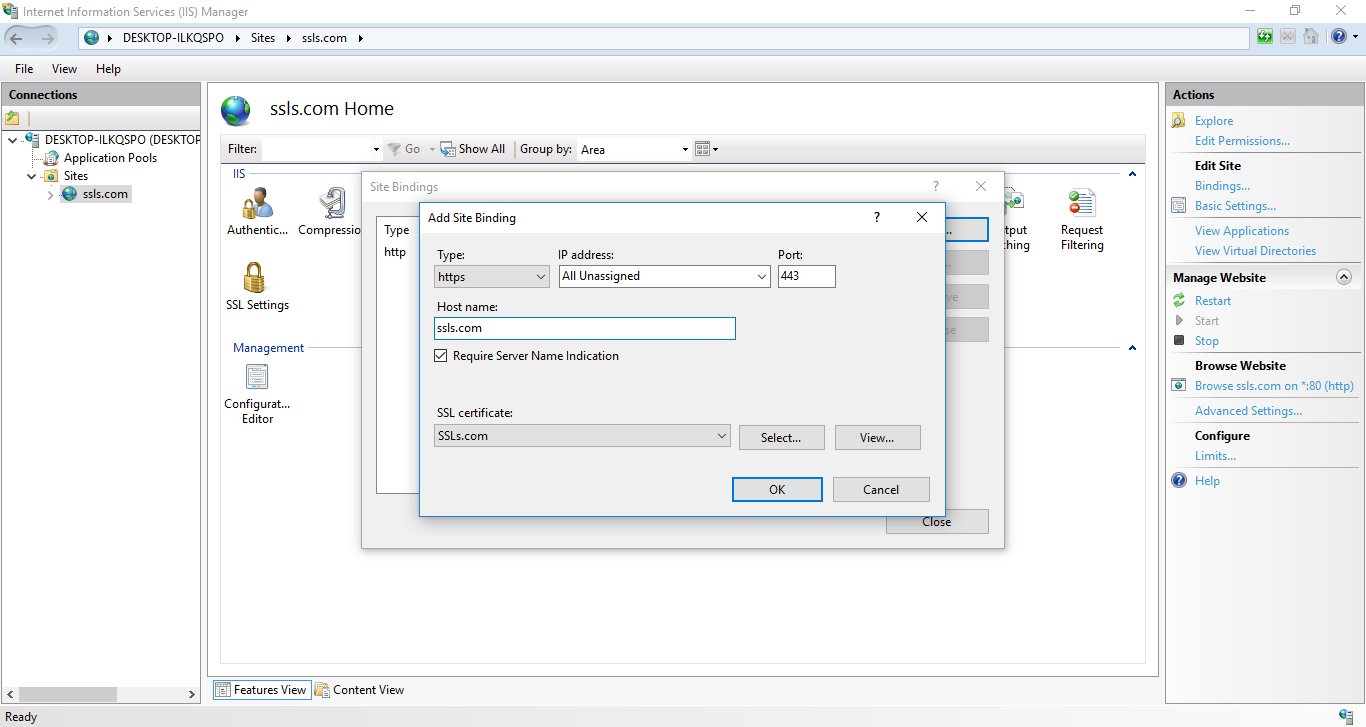 A new binding will appear in the Site Bindings section.
 - Now the website should be available via HTTPS. You can check if it is installed correctly here.
Certificate Request generated outside IIS
If the “Create CSR in-browser” option was chosen during the SSL activation, or the CSR code was generated elsewhere outside the IIS server, it is necessary to generate a PFX file containing the certificate, CA bundle, and private key, and use it for the import in IIS.
Check the details in our step-by-step guide regarding this process.
Check your SSL installation using this tool.