- Installing SSL on UDM-base
- SSL installation on UDM-pro
- SSL installation for non-UDM-based UniFi services
Unifi Dream Machine (UDM) is the newest console for network management by UniFi. It usually has UniFi OS (a type of Debian-based Linux Operating System) installed. There are two versions of UniFi OS. The first is a modification of older UniFi controllers known as UDM-base. The second version is UDM-Pro, which has an easy-to-use own graphical interface.
Installing SSL on UDM-base
UniFi controller’s Official documentation outlines a specific way to install an SSL certificate. Although this is a reasonably straightforward method, many people experience an error message that doesn’t indicate the actual root.
In this guide, you’ll find multiple alternative ways to install your SSL, as well as tips for fixing common errors, and some helpful advice for boosting security.
PLEASE NOTE: Servers may sometimes use a default server certificate instead of the one you install. Web browsers don’t consider such certificates to be secure and may result in website users receiving security warnings. If this happens to you, you can resolve it by following the below steps, no matter what installation method you used:
- Connect to UniFi.
- Run the following command to stop running UniFi Controller:
unifi-os stop - Remove the default certificate file’s link and copy the certificate file you installed via:
rm /usr/lib/unifi/data/keystore && cp /etc/ssl/private/unifi.keystore.jks /usr/lib/unifi/data/keystor - Comment out or remove this line in /etc/default/unifi
UNIFI_SSL_KEYSTORE=/etc/ssl/private/unifi.keystore.jks
Replacing bundle.crt with your CA Bundle file. - Use the following command to restart UniFI Controller:
unifi-os restart
Complete your SSL setup by following one of the methods outlined below.
Standard method with ace.jar
Although this method is often recommended, some peculiarities might not make it ideal for everyone.
You must install SSL in the same folder where you generated the CSR code. Finish installing your SSL using ace.jar by following these steps:
- Connect to your server.
- Use Putty or a similar application for Linux- or Windows-based machines
- Use Terminal on MacOS
- Connect to a Windows server via remote desktop (if necessary) and run cmd or PowerShell
Please note: On Windows, you must start the application with administrator rights. You can either right-click on the program icon and select Run as administrator or go to Properties >> Compatibility >> mark the Run this program as an administrator >> OK.
You must have root or sudo user access on Linux/MacOS. Enable it with this command:sudo su -
- Access the UDM files by opening the UniFi shell:
unifi-os shell - Run the following to access the UDM-base main folder:
cd /usr/lib/unifi/ - In the UniFi base folder, upload the following files from the archive you got from the Certificate Authority:
- the Security certificate file in PEM format (a .crt file);
- Root certificate;
- Intermediate certificates.
Run this command:
Replace *your certificate* with your file name.java -jar lib/ace.jar import_cert *your certificate*.crt SectigoRSADomainValidationSecureServerCA.crt USERTrustRSAAddTrustCA.crt addtrustexternalcaroot.crt
If you got the intermediate and root certificates in a single bundled file (.ca-bundle), download them individually from here.
Note: the command outlined above features an example of intermediate certificates for a Domain Validation SSL.
- UniFi will then request the keystore password. Use ‘aircontrolenterprise’ (unless you already changed it in your UniFi settings) and then import the certificate.
Please note: You may need to upload the CA bundle in a single file for some versions of the server. You can download the CA bundle from this article. Then, run this command:java -jar lib/ace.jar import_cert *your certificate*.crt bundle.crt - To apply the changes, restart UDM-base with this command:
unifi-os restart
You can check the installation here.
Important: Most common modern UniFi versions have an importation bug. You may receive an error message saying, “Unable to import the certificate into keystore” after importing the files to the server.
This is because the modern versions of UniFi, ace.jar can’t parse the new string (\n) symbol.
You can fix this issue on On Linux and macOS by removing these symbols using this command:
tr -d '\n\r' < *file name* > *temporary file name* && mv *temporary file name* *file name*
Where you put the full name of the required file in the *file name*. Run the command for your certificate, each intermediate certificate, and the root certificate.
Since the command won’t let you save modified content directly to the same file, you need to add *temporary file name* as a temporary file. So you need to save it in a temporary place before using it to replace the old file.
Alternatively, run this command:tr -d '\n\r' < *file name* | echo $(cat -) > *file name*
You can fix the certificate files on Windows by using Notepad++ by performing the following steps:
- Use a text editor to open the file.
- Click ctrl+F and navigate to the Replace tab.
- Click the Extended option to replace the service symbols.

- In the form, type \n, then click Replace All.
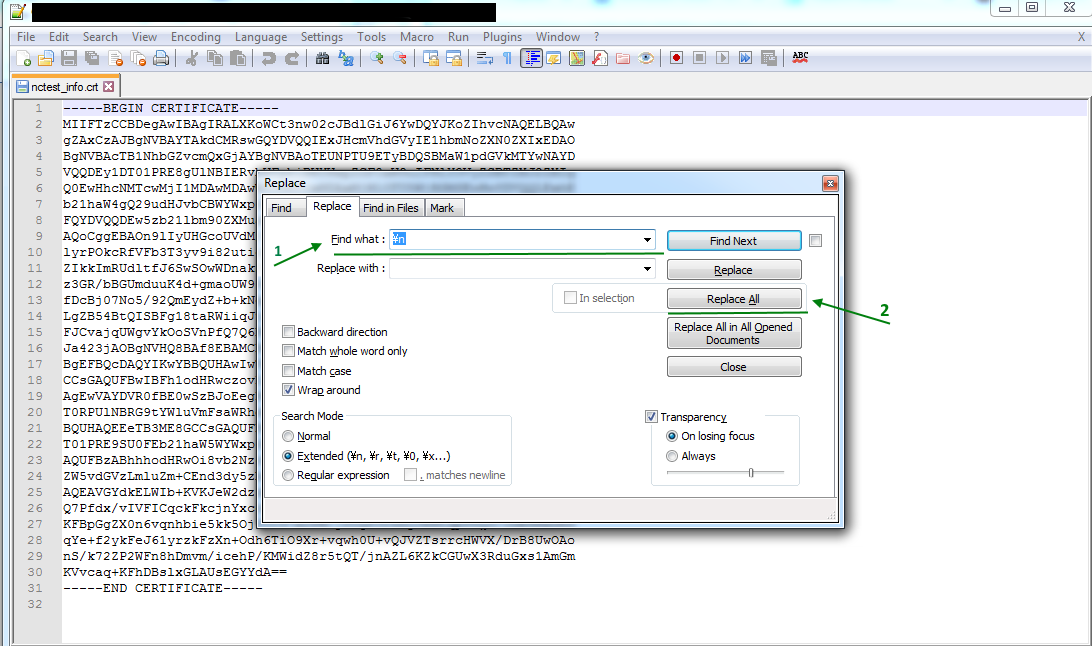
- Do the same thing again but with \r.
- Save the file.
Installation with keytool
A keytool is a flexible installation method with no parsing issues. The process is similar to installing an SSL on a Tomcat server.
Importing PKCS7
The standard way is to import the file in PKCS#7 format (.p7b or .cer extension) inside the keystore.
Follow Steps 1-3 as described in the Standard method with ace.jar.
The Private key for the certificate should be saved in the default UniFi keystore in the /data/keystore file following CSR generation.
- Upload your security certificate file to the UniFi base folder in the PKCS#7 format (.cer or .p7b).
- Run the following command to import the uploaded file to the keystore:
Use the password aircontrolenterprise (unless you previously changed it in your UniFi settings) and complete the import by pressing Enter.keytool -import -trustcacerts -alias unifi -file *your certificate*.p7b -keystore /data/keystore - To apply the changes, restart UDM-base:
unifi-os restart
Installation should now be complete. Check that it worked here.
IMPORTANT NOTE: When importing the SSL in the PKCS#7 format, you might get an error message saying, “Input not an X.509 certificate” It could be due to extra empty strings or other issues related to formatting. If it doesn’t help to edit the file in a text editor, try importing the SSL as PEM files.
On Windows, you can also try the following:
- Switch the certificate to the .cer file extension.
- Right-click the certificate file and select Install certificate. Click through all the options until the Finish button appears.
TIP: In Internet Explorer, install it by going to Tools >> Internet Options. - Head to the Content tab and click Certificates.
- In the Other tab, select your certificate and then Export.
- Click Next.
- Click “Cryptographic Message Syntax Standard – PKCS#7 Certificates (.P7B)” and select the box, “Include all certificates in the certification path if possible”.
- Hit Next >> Browse. Write up the new combined file name and path to save it.
TIP: Save it with a .cer extension. - Select Next and Finish.
- In the keystore, use this new file during installation.
Importing PEM
Importing the certificate file in PEM format (.crt) is another option.
The following example features files for a Domain Validation SSL, but the method for installing other SSL types is very similar. Find the files for your SSL type here.
- Use this command to import the root certificate:
keytool -import -trustcacerts -alias root -file addtrustexternalcaroot.crt -keystore /data/keystore - One at a time, import the intermediate certificates using separate aliases:
keytool -import -trustcacerts -alias intermediate2 -file USERTrustRSAAddTrustCA.crt -keystore /data/keystorekeytool -import -trustcacerts -alias intermediate1 -file SectigoRSADomainValidationSecureServerCA.crt -keystore/data/keystore - With the alias unifi, import the SSL certificate:
keytool -import -trustcacerts -alias unifi -file *your certificate*.crt -keystore /data/keystorePLEASE NOTE: For each import, you need to enter the keystore password. Press Enter to complete the process.
TIP: To avoid entering the password each time, to the end of the command, you can add the argument -storepass *password*, putting your actual password for the UniFi keystore in place of *password*.
- Apply the changes by restarting UDM-base:
unifi-os restart
The files are the same as with the ace.jar standard installation method
Command line PFX file import
If you generated the CSR code somewhere else or you used OpenSSL, you can use this option instead of using the default UniFi tool.
If you generated the CSR this way, the private key (.key) will have been created separately. Importing the key file, certificate (.crt), and chain (.ca-bundle) files into the keystore is required.
If you want to perform the whole process via command line:
- Into the UniFi base folder, upload the PEM security certificate file (.crt), and chain file (.ca-bundle) from the archive you got from the CA. For your convenience, move or upload the private key file to the same folder.
You can put them in different folders, but if you do, you need to add the full paths to the files in the command in step 5.
- Use the following OpenSSL command to generate the PKCS#12 (PFX):
openssl pkcs12 -export -out *your certificate*.pfx -inkey *your certificate*.key -in *your certificate*.crt -certfile *your certificate*.ca-bundle -name "unifi" - Import the PFX file you just created into the keystore:
keytool -importkeystore -srckeystore *your certificate*.pfx -srcstoretype PKCS12 -destkeystore /data/keystore -deststoretype jks -deststorepass *password*Make sure to replace *password* with your actual keystore password.
- Apply the changes by restarting UDM-base:
unifi-os restart
Follow these steps if you want to generate the PFXsomewhere else (for example, using our converter):
- Use any convenient tool to generate the PKCS#12 (PFX) file
- Upload the PFX file to the UniFi base folder on the server where the UniFi controller is installed.
- Then import the PFX file to the keystore:
keytool -importkeystore -srckeystore *your certificate*.pfx -srcstoretype pkcs12 -srcalias 1 -destkeystore /data/keystore -deststoretype jks -destalias unifi -deststorepass *password*IMPORTANT NOTE: If you have a PFX file without an assigned alias, the default alias is 1. In the command, make sure to include -srcalias and -destalias. This prevents the “Alias unifi does not exist” error message. Replace *password* with your existing UniFi keystore password.
- Apply the changes by restarting UDM-base:
unifi-os restart
There is a slight possibility that the default alias will be different. Check the alias with one of these commands if you get an error message:openssl pkcs12 -in *your certificate*.pfx -info
keytool -list -storetype pkcs12 -keystore *your certificate*.pfx -v
SSL installation on UDM-pro
To install an SSL on UDM-pro, simply replace the default private key and self-signed certificate and restart it.
- Turn on Secure Shell (SSH):
Settings >> Network Settings >> Device Authentication >> Enable it and create a username and password (alternatively, you can create an access key, which you’ll be able to do at the final step). - When you connect via SSH, enter the UDM-pro configuration folder:
cd /mnt/data/unifi-os/unifi-core/config/ - Insall your SSL files:
Inside the configuration folder, there are already two files: unifi-core.crt and unifi-core.key. These files are a self-signed certificate and a Private key.
You should replace these files with the valid certificate you got from the CA and its corresponding Private key.- In unifi-core.crt, you should upload a single file that combines your certificate (the .crt file from CA) with the intermediate and root certificates ( the .ca-bundle file from CA);
- In unifi-core.key, upload the Private key file.
There are a few ways to combine the .crt and .ca-bundle files the CA sent you:
- To /mnt/data/unifi-os/unifi-core/config/, upload both files and run this command:
cat example.crt >> unifi-core.crt ; echo >> unifi-core.crt ; cat example.ca-bundle >> unifi-core.crt - Using a plaintext editor (Notepad, Notepad++, TextEdit, Text), you can open both files to create a combined unifi-core.crt file on your computer by pasting the certificate code first and then the CA-bundle below it. Upload it to UDM when you’re done.
- Or copy the content of both files and paste it to unifi-core.crt, adding the certificate first and the CA-bundle below it.
You can use a Linux editor like nano or vi (run
nano unifi-core.crt) to open it in the command line.
- Restart UDM-pro when you have replaced both files:
unifi-os restart
SSL installation for non-UDM-based UniFi services
Some of the installation methods mentioned above for UDM-base also work on older versions of UniFi controller. But some methods that used to work no longer work. We go through them below.
Keytool installation (for Windows)
This is almost exactly the same as it is on Linux. Just upload the files to the server and install them in the keystore using keytool commands. However, in contrast to Linux servers, on Windows, you need to include the full path to a file while running an application. Unless the file is in the same folder as where you’re running a command, you need to use the full path to keytool.exe, certificate files, and the keystore
Use a command like the following if you want to import the files in a PKCS#7 format: "*Java base folder*\bin\keytool.exe" -import -trustcacerts -alias unifi -file *your certificate*.p7b -keystore "C:\Users\*account username*\Ubiquiti UniFi\data\keystore"
*Java base folder* is specified when Java is being installed on the server. It’s usually called “C:\Program Files\Java\*Java version*\” by default.
Another option is to switch to the Java base folder by running this command:cd *Java base folder*
run this to import the file:keytool -import -trustcacerts -alias unifi -file “C:\Users\*account username*\Ubiquiti UniFi\*your certificate*.p7b” -keystore “C:\Users\*account username*\Ubiquiti UniFi\data\keystore”
Close and restart UniFi by using the application icon.
Run the following commands if UniFi is configured as a Windows service: net stop "UniFi Controller"net start "UniFi Controller"
Now, the certificate should be installed.
If you want to import PEM certificates, follow the instructions in the Importing PEM, making sure to specify the full path to the files in every command.
Importing PFX files using Keystore Explorer
If you want to import PFX files on UniFi on Windows, the easiest way to do it is by using “Keystore Explorer”. It’s also possible to use it on Linux/Mac OS, but it works best on Windows.
- In Keystore Explorer, open the current keystore file, either by using the default password aircontrolenterprise or another one used by the controller.
TIP: Add a custom password by opening the file system.properties:
app.keystore.pass=*password*You can find this file in the UniFi base folder’s data subfolder.
- You need to generate the PFX (PKCS#12) format file by following the instructions in the PFX format section or by using an online tool (such as our converter).
You’ll need to create a new password for this, different from the UniFi controller password.
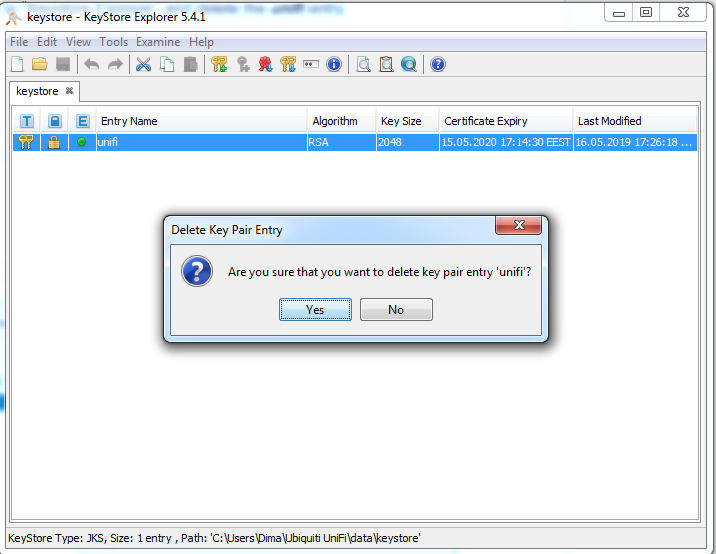
- Go back to Keystore Explorer and delete the unifi entry once you’ve created your PFX file.
- Go to: Tools >> Import Key Pair >> PKCS12.
Find your PFX file and use the password you created.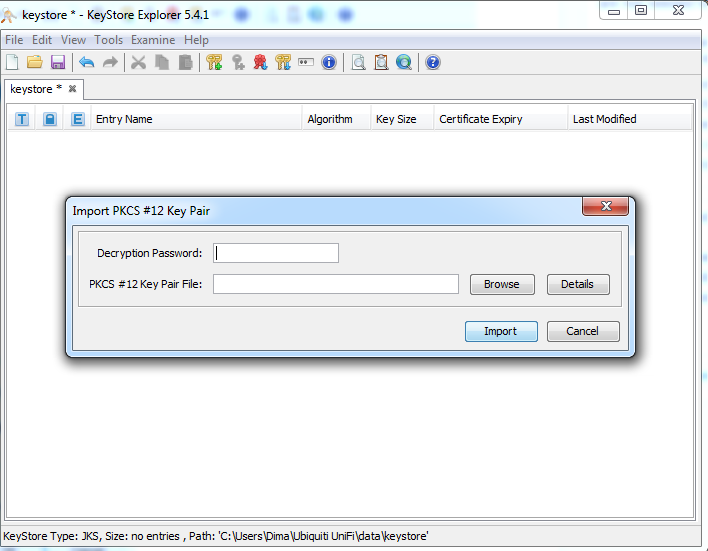
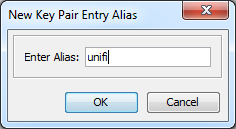
- Set the Key Pair Entry Alias to unifi.
- Enter the keystore password (which is aircontrolenterprise unless you changed it in your UniFi settings).
- Save it by clicking File >> Save (or the related button).
- Apply the changes by restarting the controller.
On Linux:
service unifi restartYou’ll need to close and restart UniFi on Windows using the application icon. Alternatively, if UniFi is configured as a Windows service, you can use these commands:
net stop "UniFi Controller"
WARNING: The keystore can sometimes become corrupted if there have been numerous imports. If the process fails, only proceed with the PFX import after you delete the original keystore file and restart UniFi to create a new one.net start "UniFi Controller"
Using command line for PFX file import (Windows)
This is a similar process to installing an SSL certificate on Linux. Generate the PFX file by performing these steps:
- Save your certificate and private key files to the same folder with these file names and extensions: example.p7b, example.key. In cmd or PowerShell, run the command:
Another option is to generate it with OpenSSL by putting the certificate, private key, and CA-bundle in a single folder and running the command:certutil -mergepfx *your certificate*.p7b *your certificate*.pfx*OpenSSL path* pkcs12 -export -out *your certificate*.pfx -inkey *your certificate*.key -in *your certificate*.crt -certfile *your certificate*.ca-bundle -name "unifi"On Windows, the default OpenSSL path (if it is installed) is “C:\*OpenSSL version*\bin\OpenSSL.exe”.
- Import your new PFX file to the keystore:
*Java base folder* will have been specified when Java was installed on the server. The folder is generally called “C:\Program Files\Java\*Java version*\” by default."*Java base folder*\bin\keytool.exe" -importkeystore -srckeystore *your certificate*.pfx -srcstoretype pkcs12 -srcalias 1 -destkeystore "C:\Users\*account username*\Ubiquiti UniFi\data\keystore" -deststoretype jks -destalias unifi -deststorepass *password* - You’ll need to close and restart UniFi on Windows using the application icon. Alternatively, if UniFi is configured as a Windows service, you can use these commands:
net stop "UniFi Controller"net start "UniFi Controller"
Unifi SSL security features
Although the following list doesn’t involve setting up your SSL, it features useful tips for SSL configuration and general site security.
- Although you can successfully import the files to your server, ECC certificates won’t work on Unifi.
- Unifi doesn’t support Server Name Indication (SNI).
- Newer versions of UniFi starting from 4.x have HTTPS redirect enabled by default. Check via the UniFi admin panel. You can access it using the http:// link (this is *hostname*:8080 in system.properties by default). If you have already installed an SSL certificate on UniFi, it will forward you to the https:// link (https://*hostname*:8443 by default).
- If you want to enable HSTS on UniFi, do it by modifying the following parameters in the system.properties file:
unifi.https.hsts=false– enable HSTS by setting it to trueunifi.https.hsts.max_age=*value*– here, you can set the length of time (in seconds) that you want HSTS to be cachedunifi.https.hsts.preload=false— only switch this to true if you don’t want to remove HSTS later. Otherwise, your UniFi hostname will be added to the preload list, and you can only delete it when you request it specifically.unifi.https.hsts.subdomain=false– if you want to apply an HSTS policy for your main domain and its subdomains, set to trueTo complete the process, uncomment the strings above, save the file, and restart UniFi.
- Enable your preferred cipher suites and SSL/TLS versions on UniFi by using the following parameters in the system.properties file:
unifi.https.ciphers=cipher1, cipher2, etc.– replacing the cipher1, cipher2 values with the real names of ciphers you wish to enable.unifi.https.sslEnabledProtocols=protocol1, protocol2, etc.– replacing the rotocol1, protocol2 values with the real names of protocols you wish to enable.To complete the process, uncomment the strings above, save the file, and restart UniFi.
Find the optimal UniFi configurations here.