There are times when your certificate hasn’t expired, but you need to have it reissued. For instance, these are the cases when the Private key is lost or doesn’t match the certificate, when the website moves to another host, or when some of the c
ertificate details (common name, organization name or contact details) need to be changed. The reissue process is free and it is similar to the first activation.
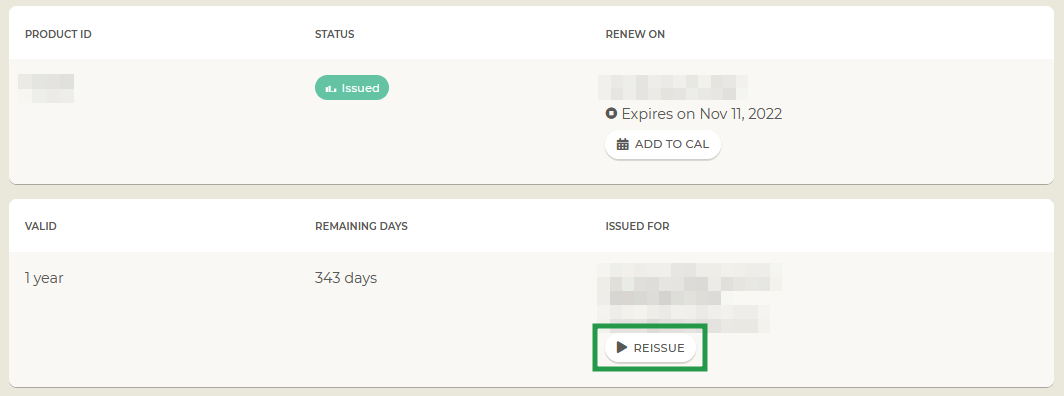
Follow these steps to complete the reissue:

3. On the Details page, click Reissue to initiate the reissue.
Next steps depend on the certificate type. Jump to the section that applies:
- PositiveSSL & EssentialSSL certificate reissue
- InstantSSL, PremiumSSL & EV SSL certificate reissue
- Multi-Domain, Unified Communications & EV Multi-Domain certificate reissue
- Next steps
PositiveSSL, EssentialSSL, PositiveSSL Wildcard & EssentialSSL Wildcard certificate Reissue
Step 1: Reissue for
Verify that the domain name you want a reissued certificate for is correct.
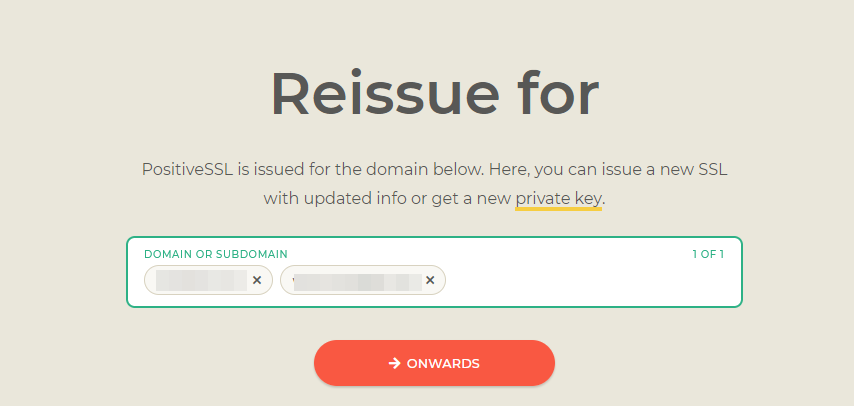
Note: you can change it by deleting the default domain tags and entering your chosen domain. Keep in mind that changing this common name for single-domain or wildcard certificates revokes the initial certificate.
Click Onwards.
Step 2: Save private key
You can download the new key automatically generated in your browser or submit a manually generated CSR.
Note: both options support IDNs with these TLDs. Paste the IDN instead of typing it, to ensure there are no mistakes.
a) Create CSR in-browser
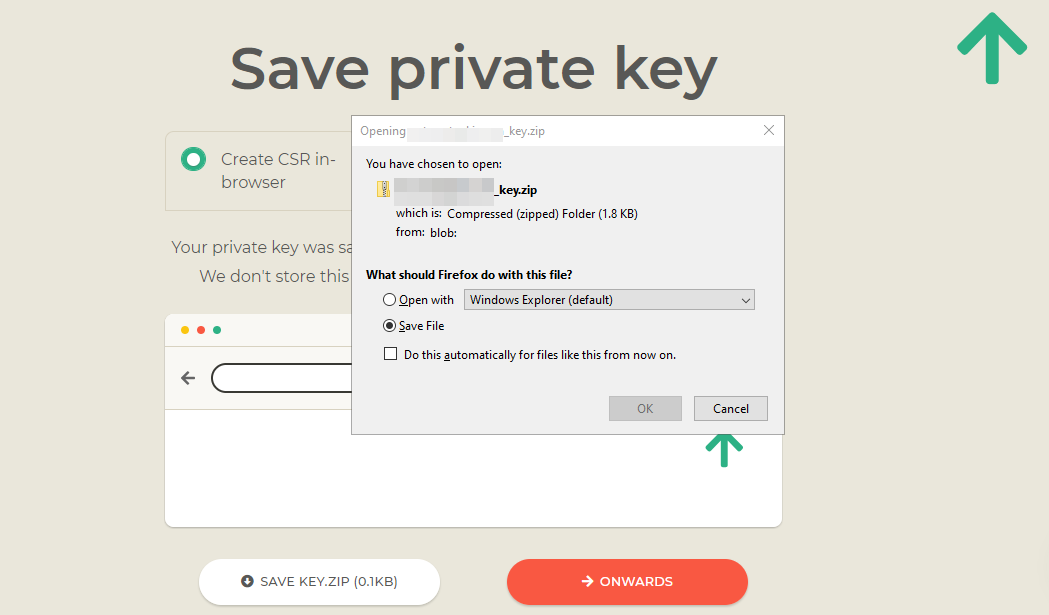
This in-browser generator is the default option. Click Save Key to download the Private key for the reissued certificate to your device.
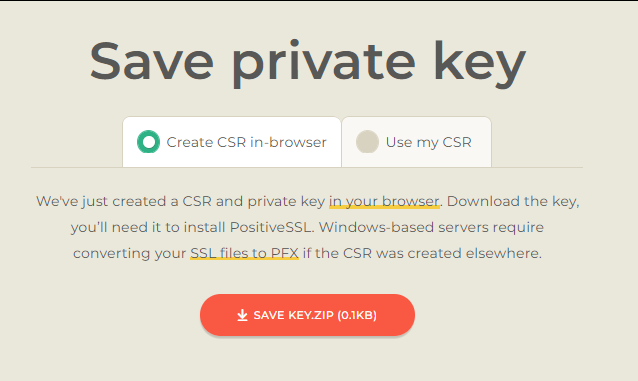
Keep in mind that by default, the Private key will be saved to the “Downloads” folder on your computer. So, ensure to keep it safe and not to remove accidentally when clearing up your downloads.
b) Manual CSR Option
To switch to using the CSR pre-generated on your server, or to receive a command to generate one, tick the I have CSR… option on the right.
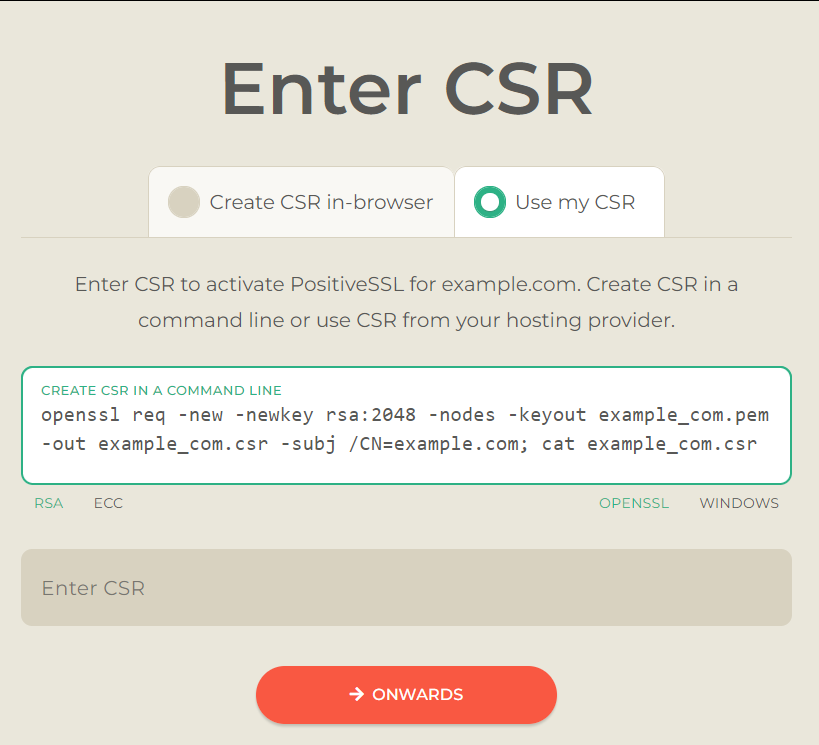
Note: you can select the encryption method and server type to receive the corresponding command in the Create CSR in a command line field.
The Private key is generated along with CSR, and should be kept on the server. This code will be needed during your SSL installation.
In the Enter CSR field, paste the CSR code, including —–BEGIN CERTIFICATE REQUEST—– and —–END CERTIFICATE REQUEST—–.
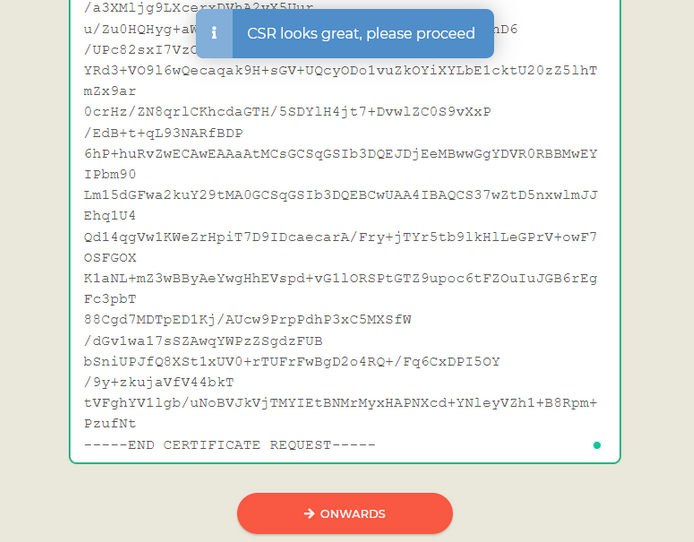
Click Onwards.
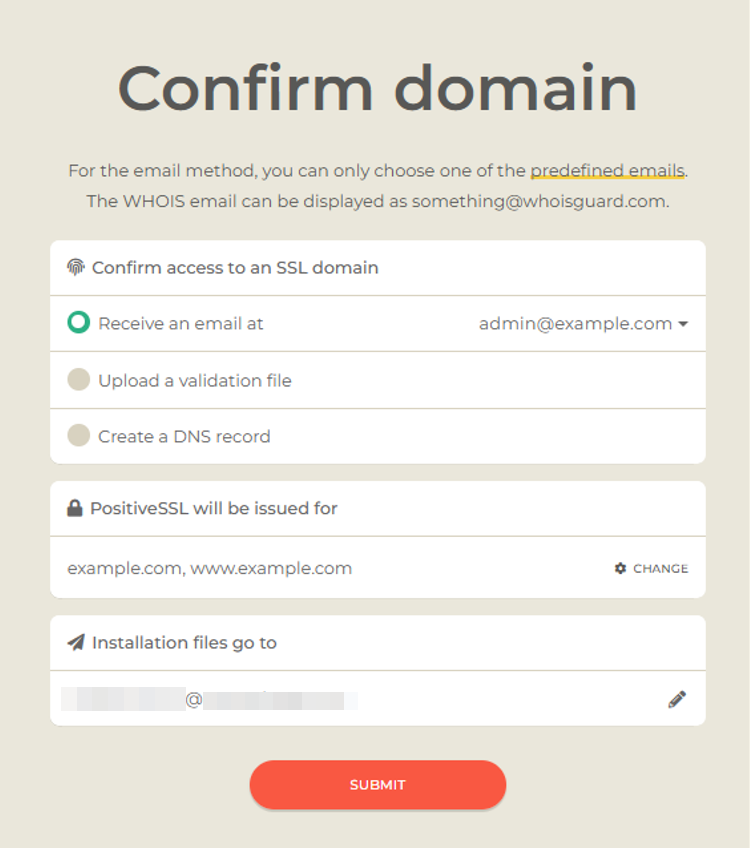
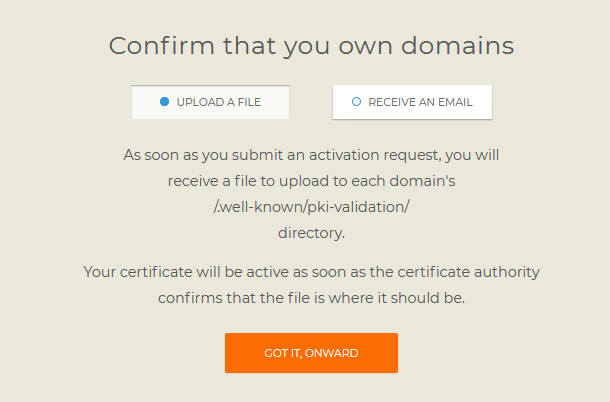
Step 3: Confirm Domain
Verify that the domain is correct.
Choose your preferred DCV method i.e. receive an email which is fastest, or upload a validation file.
Click Submit.
Now your reissued SSL certificate is activated.
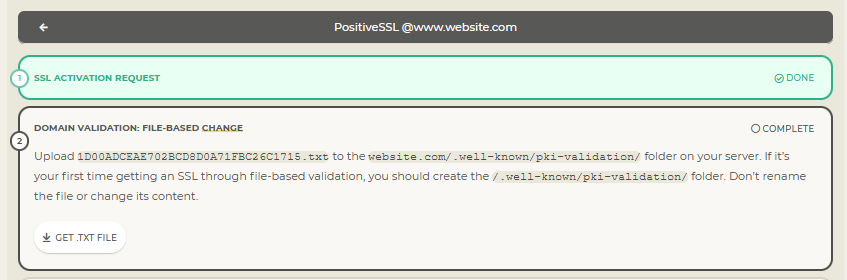
Next you’ll complete the Certificate Authority validation process.
InstantSSL, EV SSL, InstantSSL Pro, PremiumSSL & PremiumSSL Wildcard certificate Reissue
Step 1: Reissue for
Verify that the domain name you want a reissued certificate for is correct.
Note: you can change it by deleting the default domain tags and entering your chosen domain. Keep in mind that changhttps://www.ssls.com/knowledgebase/wp-content/uploads/2021/08/reissue_3.pnging this common name for single-domain or wildcard certificates revokes the initial certificate.
Click Onwards.
Step 2: Save private key
You can download the new key automatically generated in your browser, or submit a manually generated CSR.
Note: both options support IDNs with these TLDs. Paste the IDN instead of typing it, to ensure there are no mistakes.
a) Create CSR in-browser
This in-browser generator is the default option. Click Save Key to download the Private key for the reissued certificate to your device.
Keep in mind that by default, the Private key will be saved to the “Downloads” folder on your computer. So, ensure to keep it safe and not to remove accidentally when clearing up your downloads.
b) Manual CSR Option
To switch to using the CSR pre-generated on your server, or to receive a command to generate one, tick the I have CSR… option on the right.
Note: you can select the encryption method and server type to receive the corresponding command in the Create CSR in a command line field.
The Private key is generated along with CSR, and should be kept on the server. This code will be needed during your SSL installation.
In the Enter CSR field, paste the CSR code, including —–BEGIN CERTIFICATE REQUEST—– and —–END CERTIFICATE REQUEST—–.
Click Onwards.
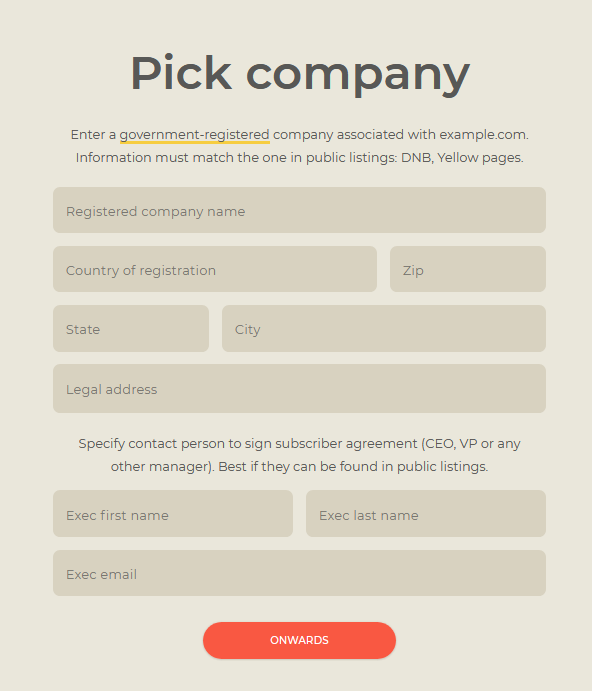
Step 3: Pick company
We will pre-fill the information from your previous certificate. Make sure that the details are correct and appear as they’re listed in the government or business directories (Yellow Pages, Duns & Bradstreet etc).
Note: you can change your company details within 45 days from the certificate reissue date.
Step 4: Confirm Domain
Verify that the domain is correct.
Choose your preferred DCV method i.e. receive an email that is fastest, or upload a validation file.
Click Submit.
Now your reissued SSL certificate is activated. Next you’ll complete the Certificate Authority validation process.
Multi-Domain SSL, Unified Communications & EV Multi-Domain certificate Reissue
First, you’ll need to get a new CSR code. You can request this from your hosting provider, or generate it yourself. View the CSR generation instructions to learn more.
Once you have a new CSR, you’re ready for Step 1 below.
Reissue is free of charge, unless you are adding additional domains (SANs).
If you’re reissuing EV Multi-Domain, Multi-Domain SSL or Unified Communications certificates using the same contact information, you’ll speed up the validation process.
You can change your company details via reissue within 45 days from the certificate initial issuance date.
Note: all our certificates can be reissued for a different domain.
Now let’s get started:
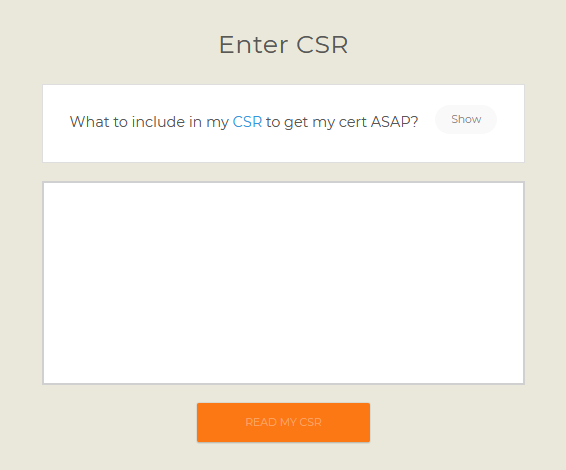
Step 1: Enter CSR
Copy and paste the CSR code generated for the certificate reissue.
Step 2: Domains
Select the server type that the certificate will be installed on.
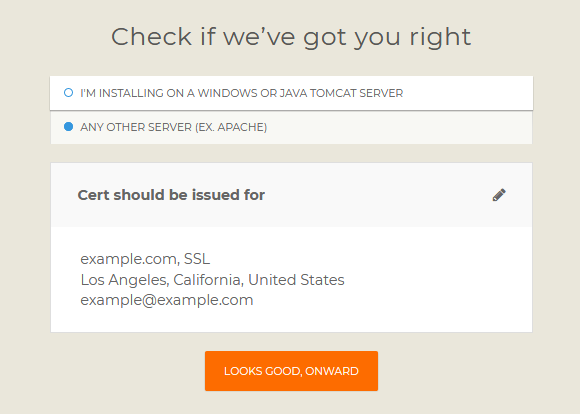
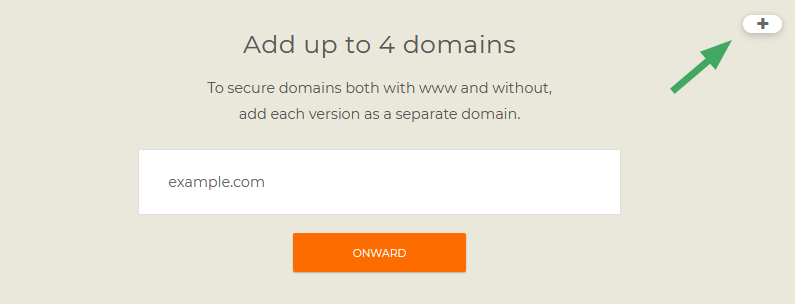
Check the domains (SANs) that will be secured by SSL, and click Onward. Alternatively you can re-generate the CSR by following the prompt messages.
You can easily add more domains using the + button.
Step 3: Domain Ownership
Choose your preferred DCV method i.e. receive an email which is fastest, or upload a validation file.
Confirm or change your administrative contact information:
- First/Last name
- SSL Admin contact
- Phone number
- Fax number
- Country
- State
- City
- Zip code
- Address
- Company name
- Job Title
EV SSL, Multi-Domain SSL and Unified Communications certificates will have separate fields for the company details, and/or callback verification information.
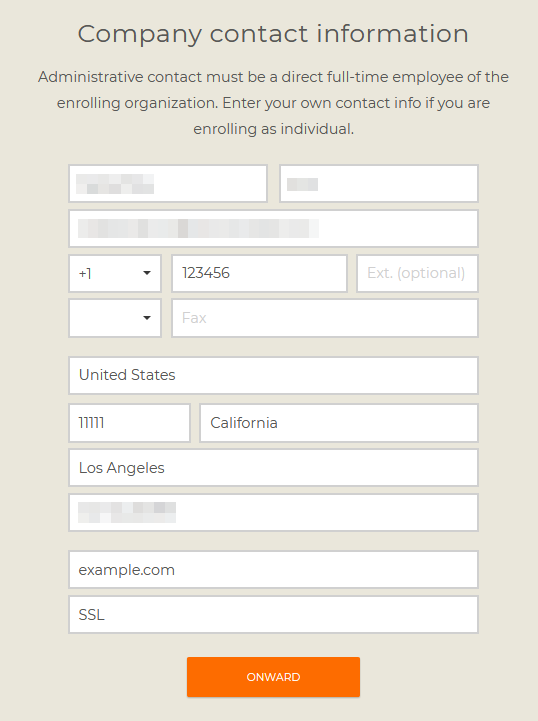
Note: it’s not possible to change your administrative email address during the reissue process. The reissued certificate will be sent to the same email that was chosen during your original certificate activation.
Now your reissued SSL certificate is activated. Next you’ll complete the Certificate Authority validation process.
Next steps
Use these guides to help you with Certificate Authority validation:
- Domain Control Validation (DCV) process.
- Company Validation process for OV and EV certificates i.e. they require additional verification.
Note: to speed up the validation process of a Sectigo SSL (e.g. InstantSSL), use the Sectigo Order Status Checker.
After the Certificate Authority has completed your validation, they will send your reissued SSL to your specified administrative email address. If you don’t receive it for some reason, you can always download the certificate from your account.
Note: don’t forget to install the reissued certificate on your server to replace the old one.